
Self Forming Structures: An Exploration into 3D Printing on Pre-stretched Fabric

Fabrication
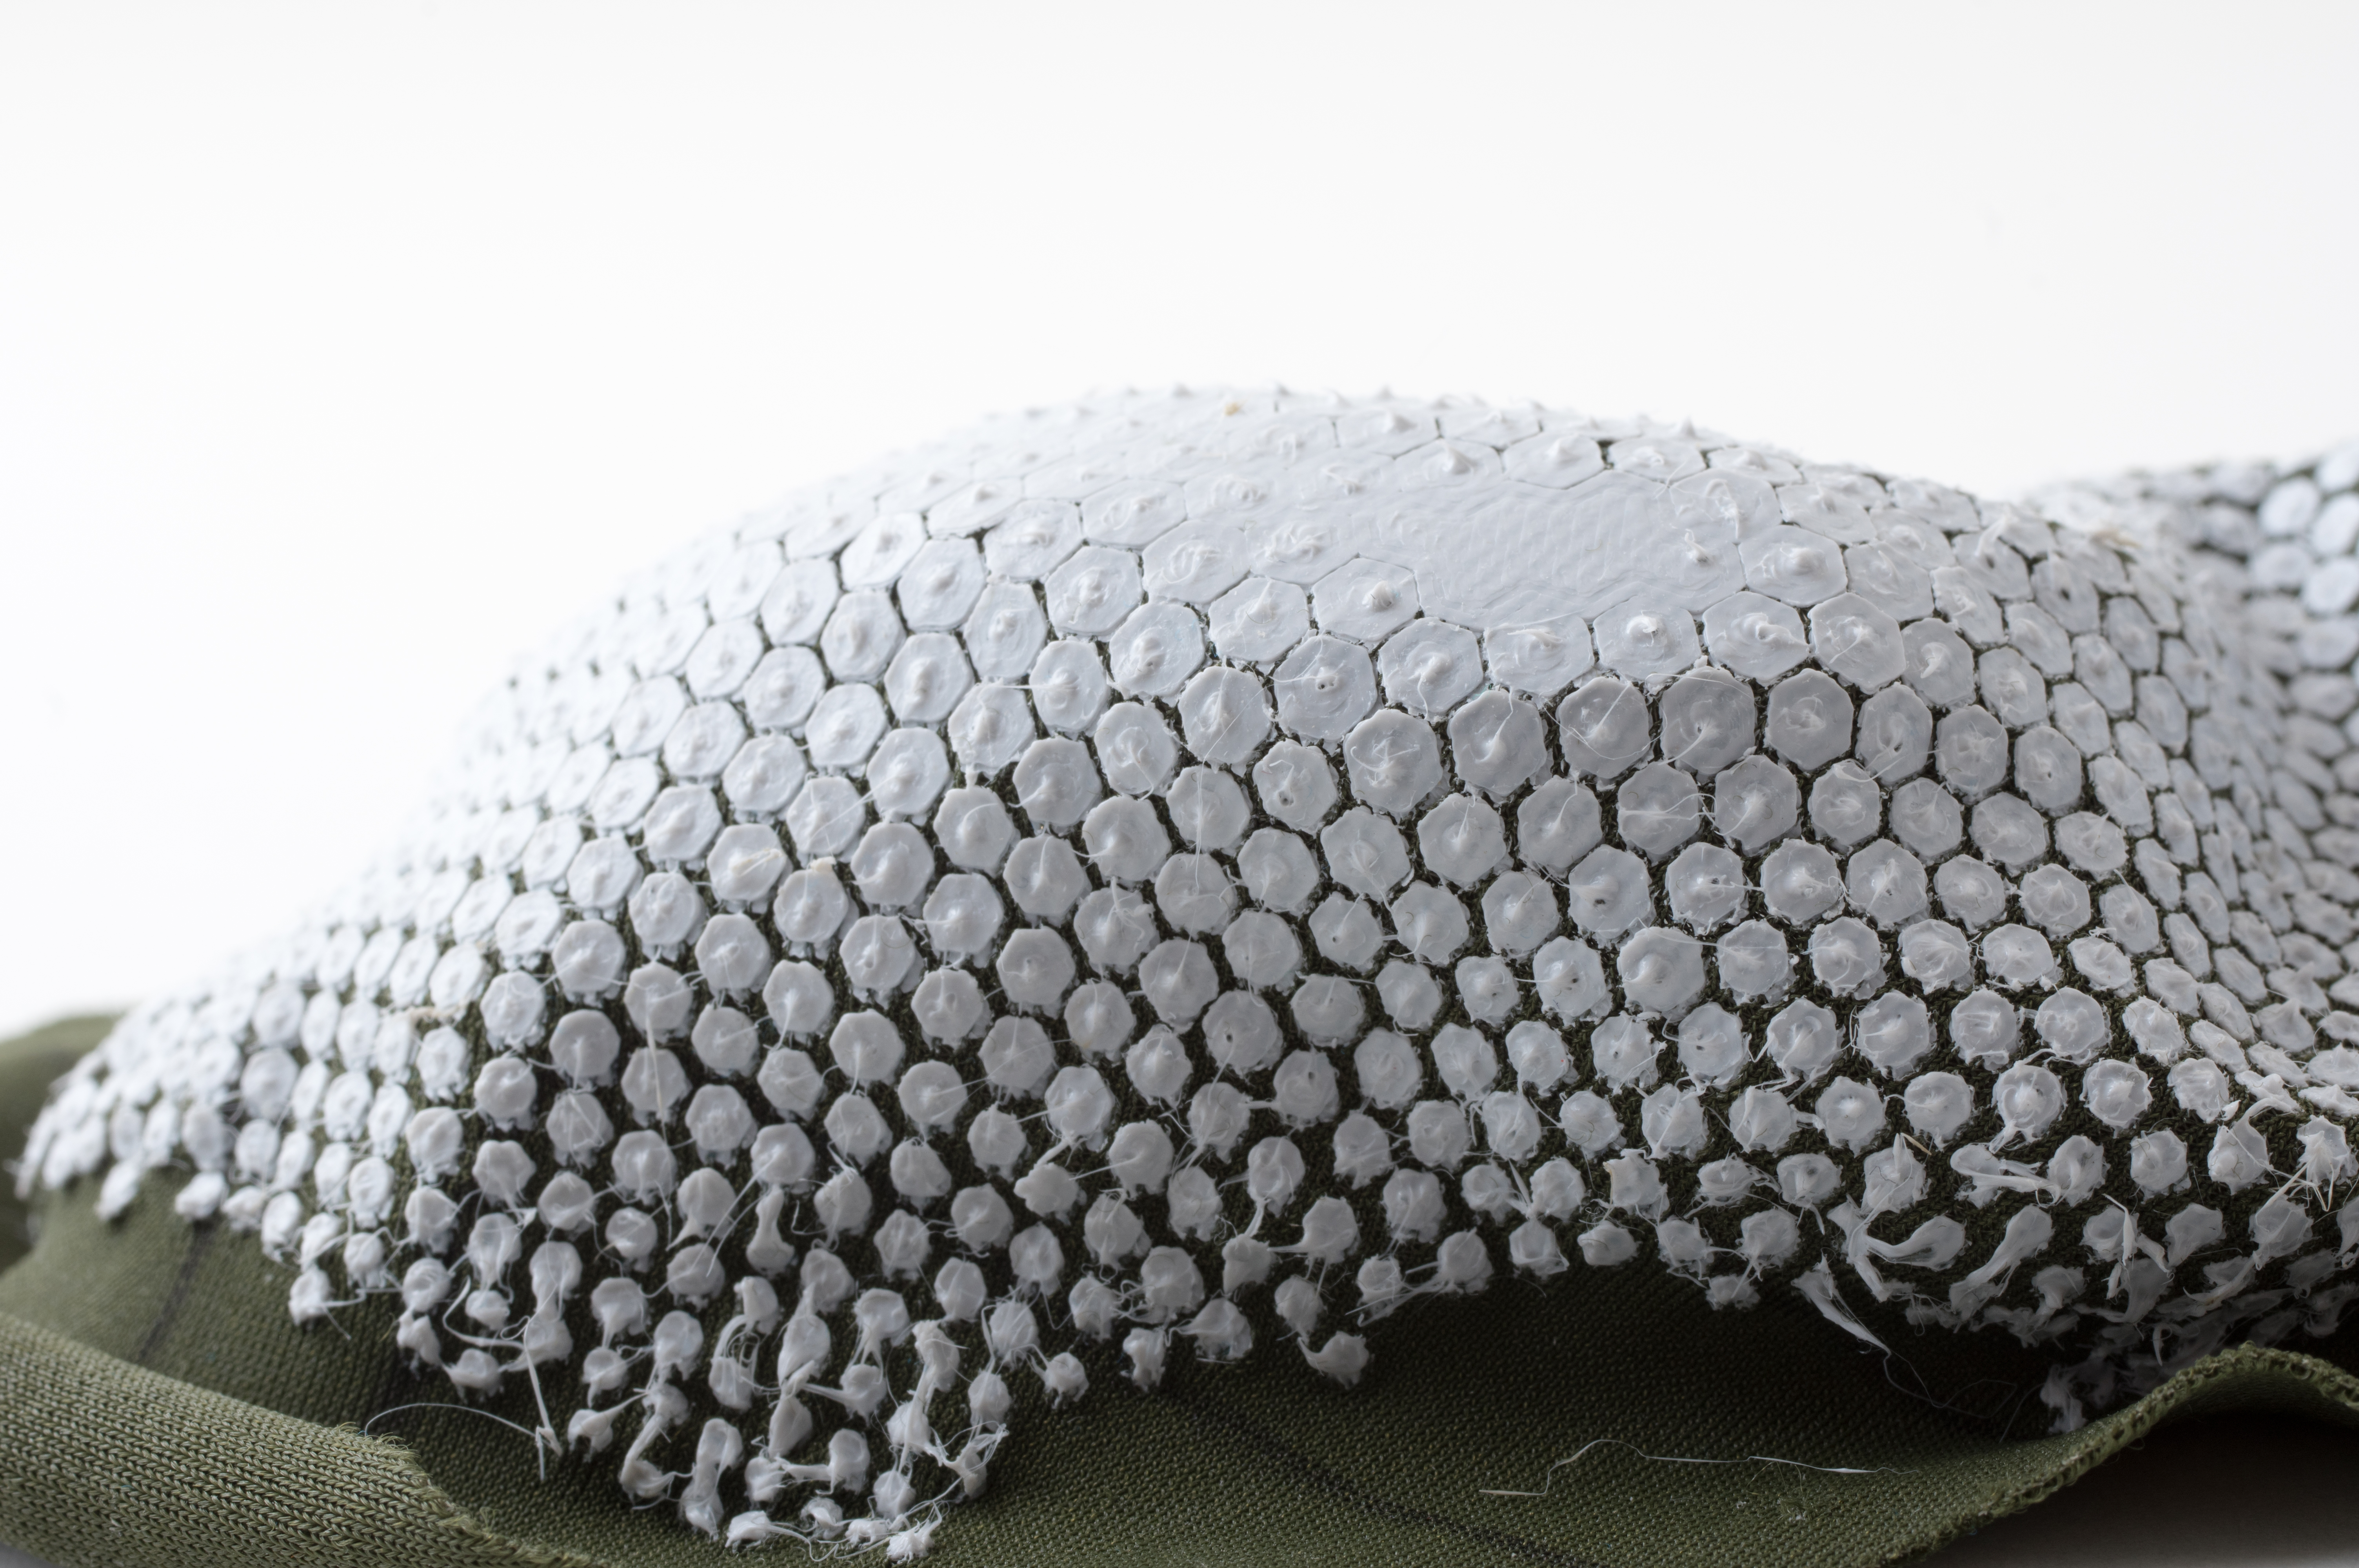
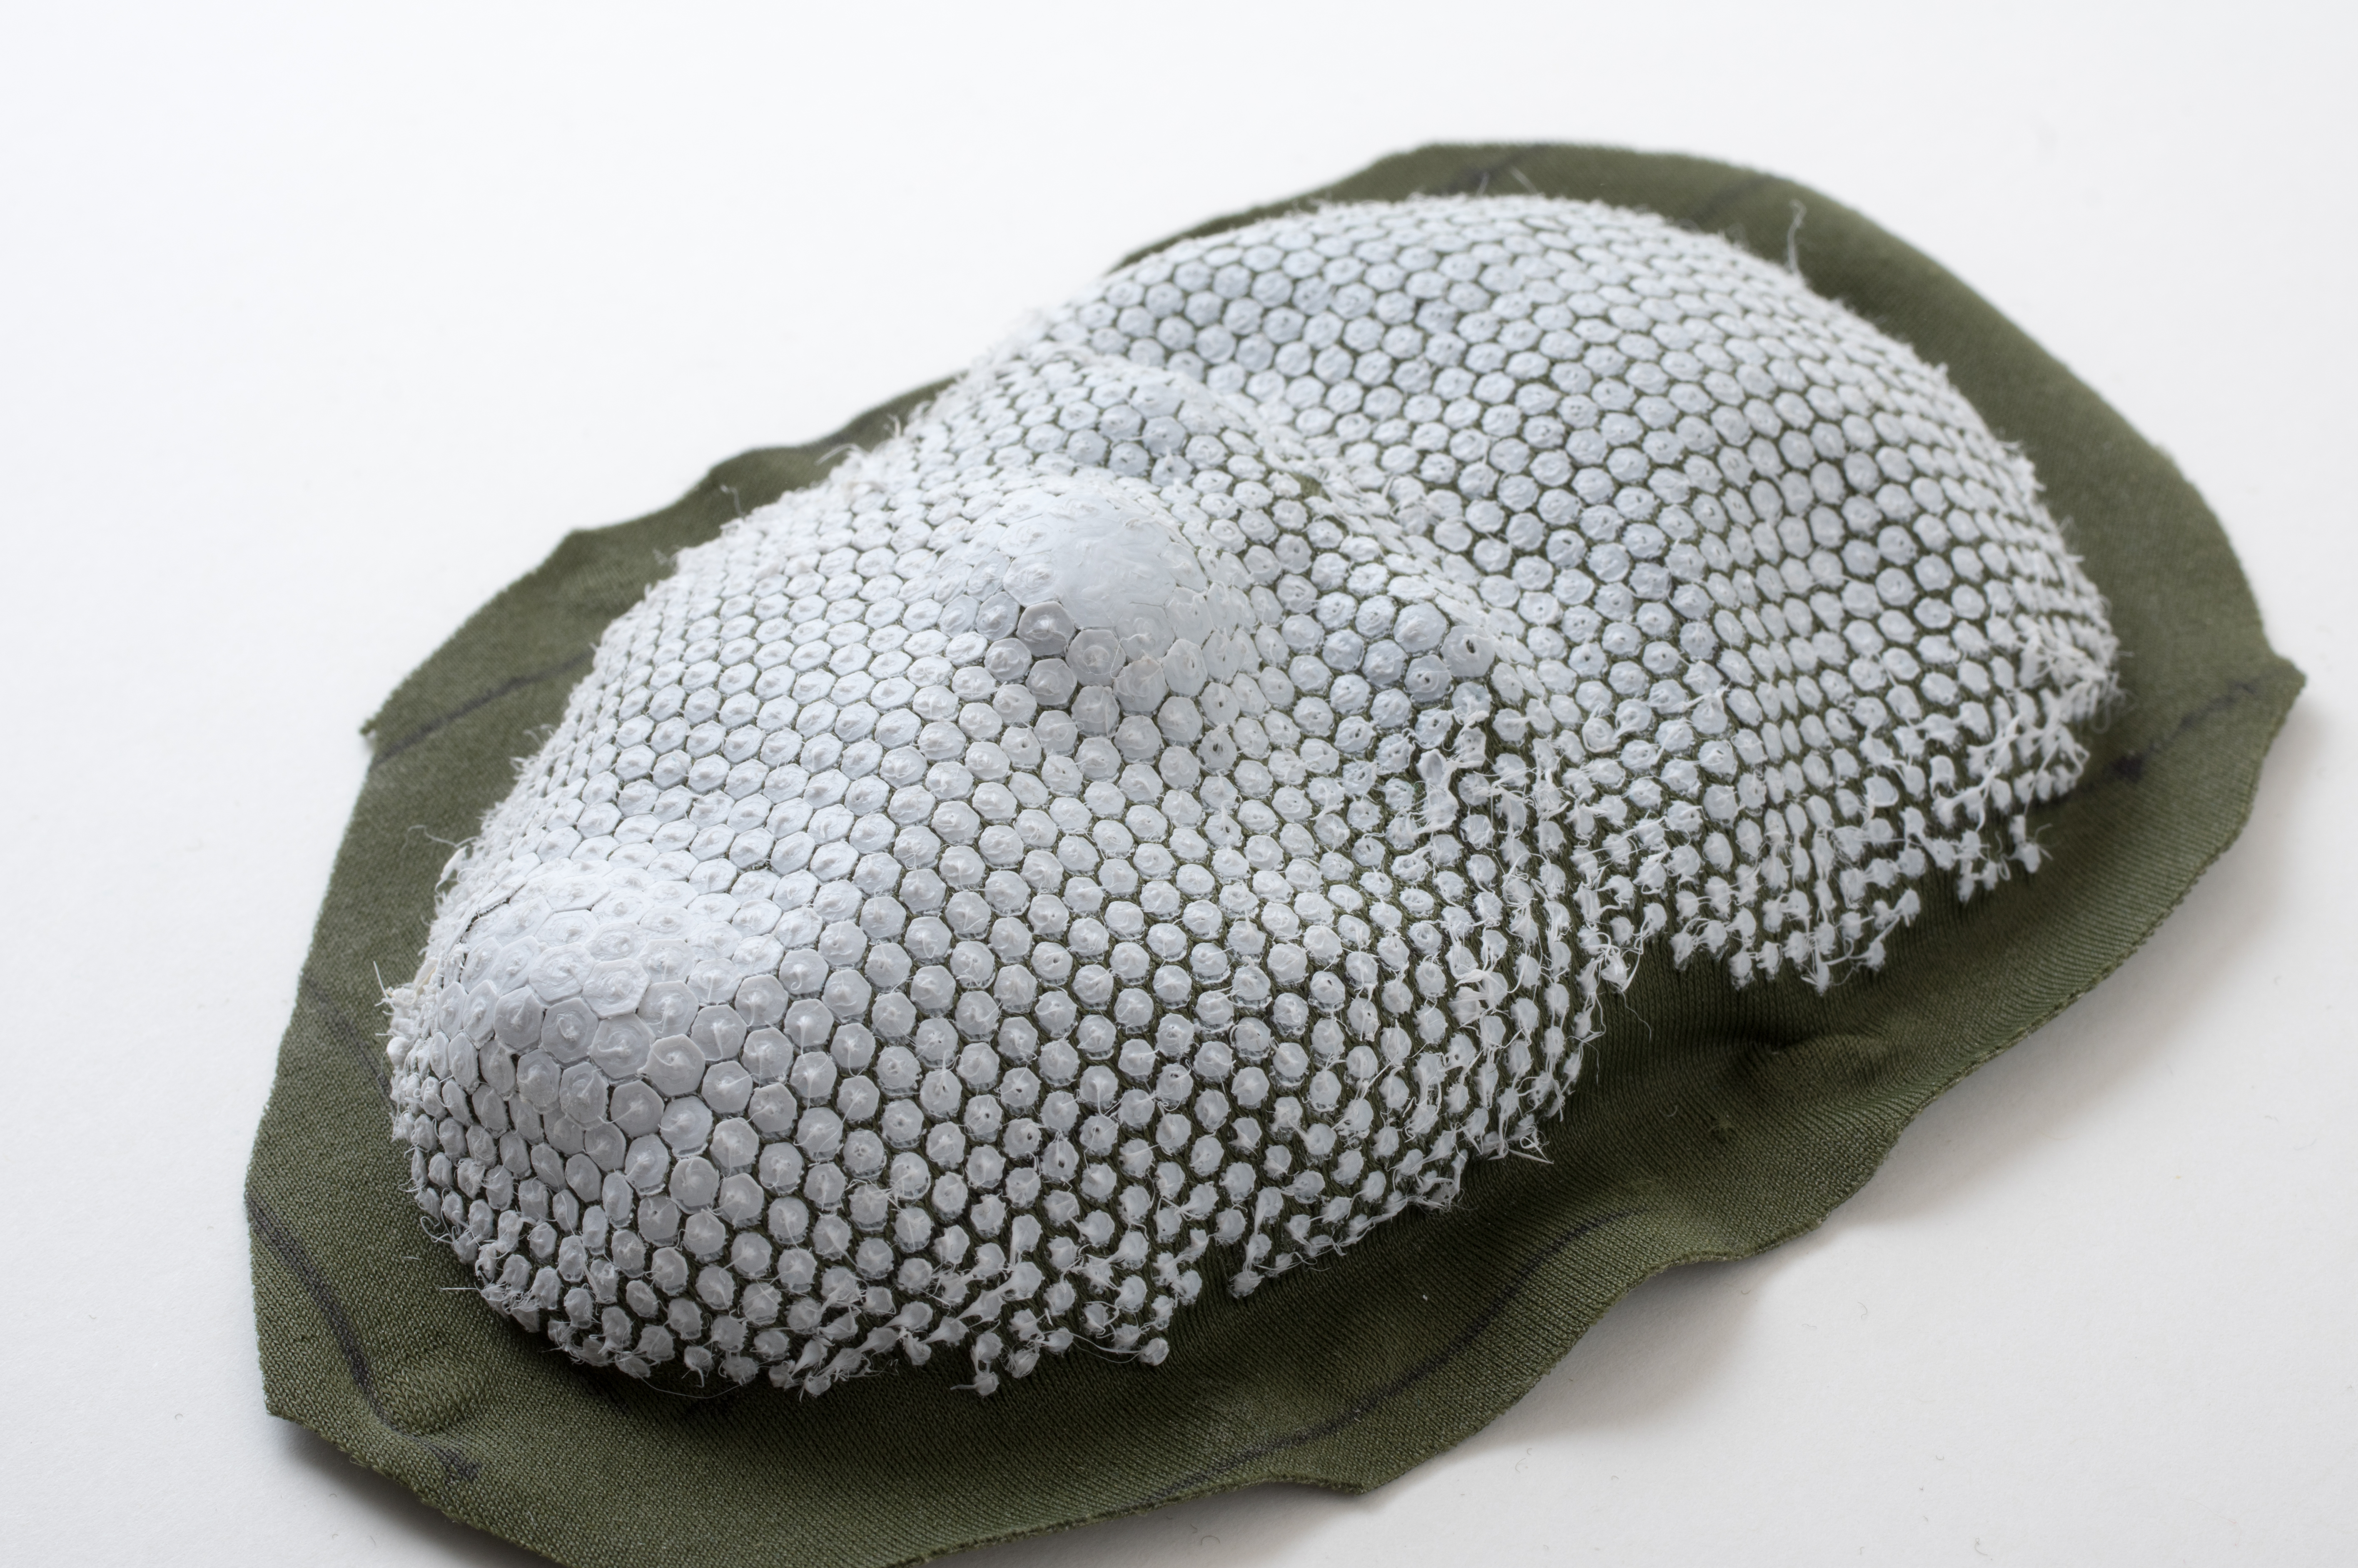
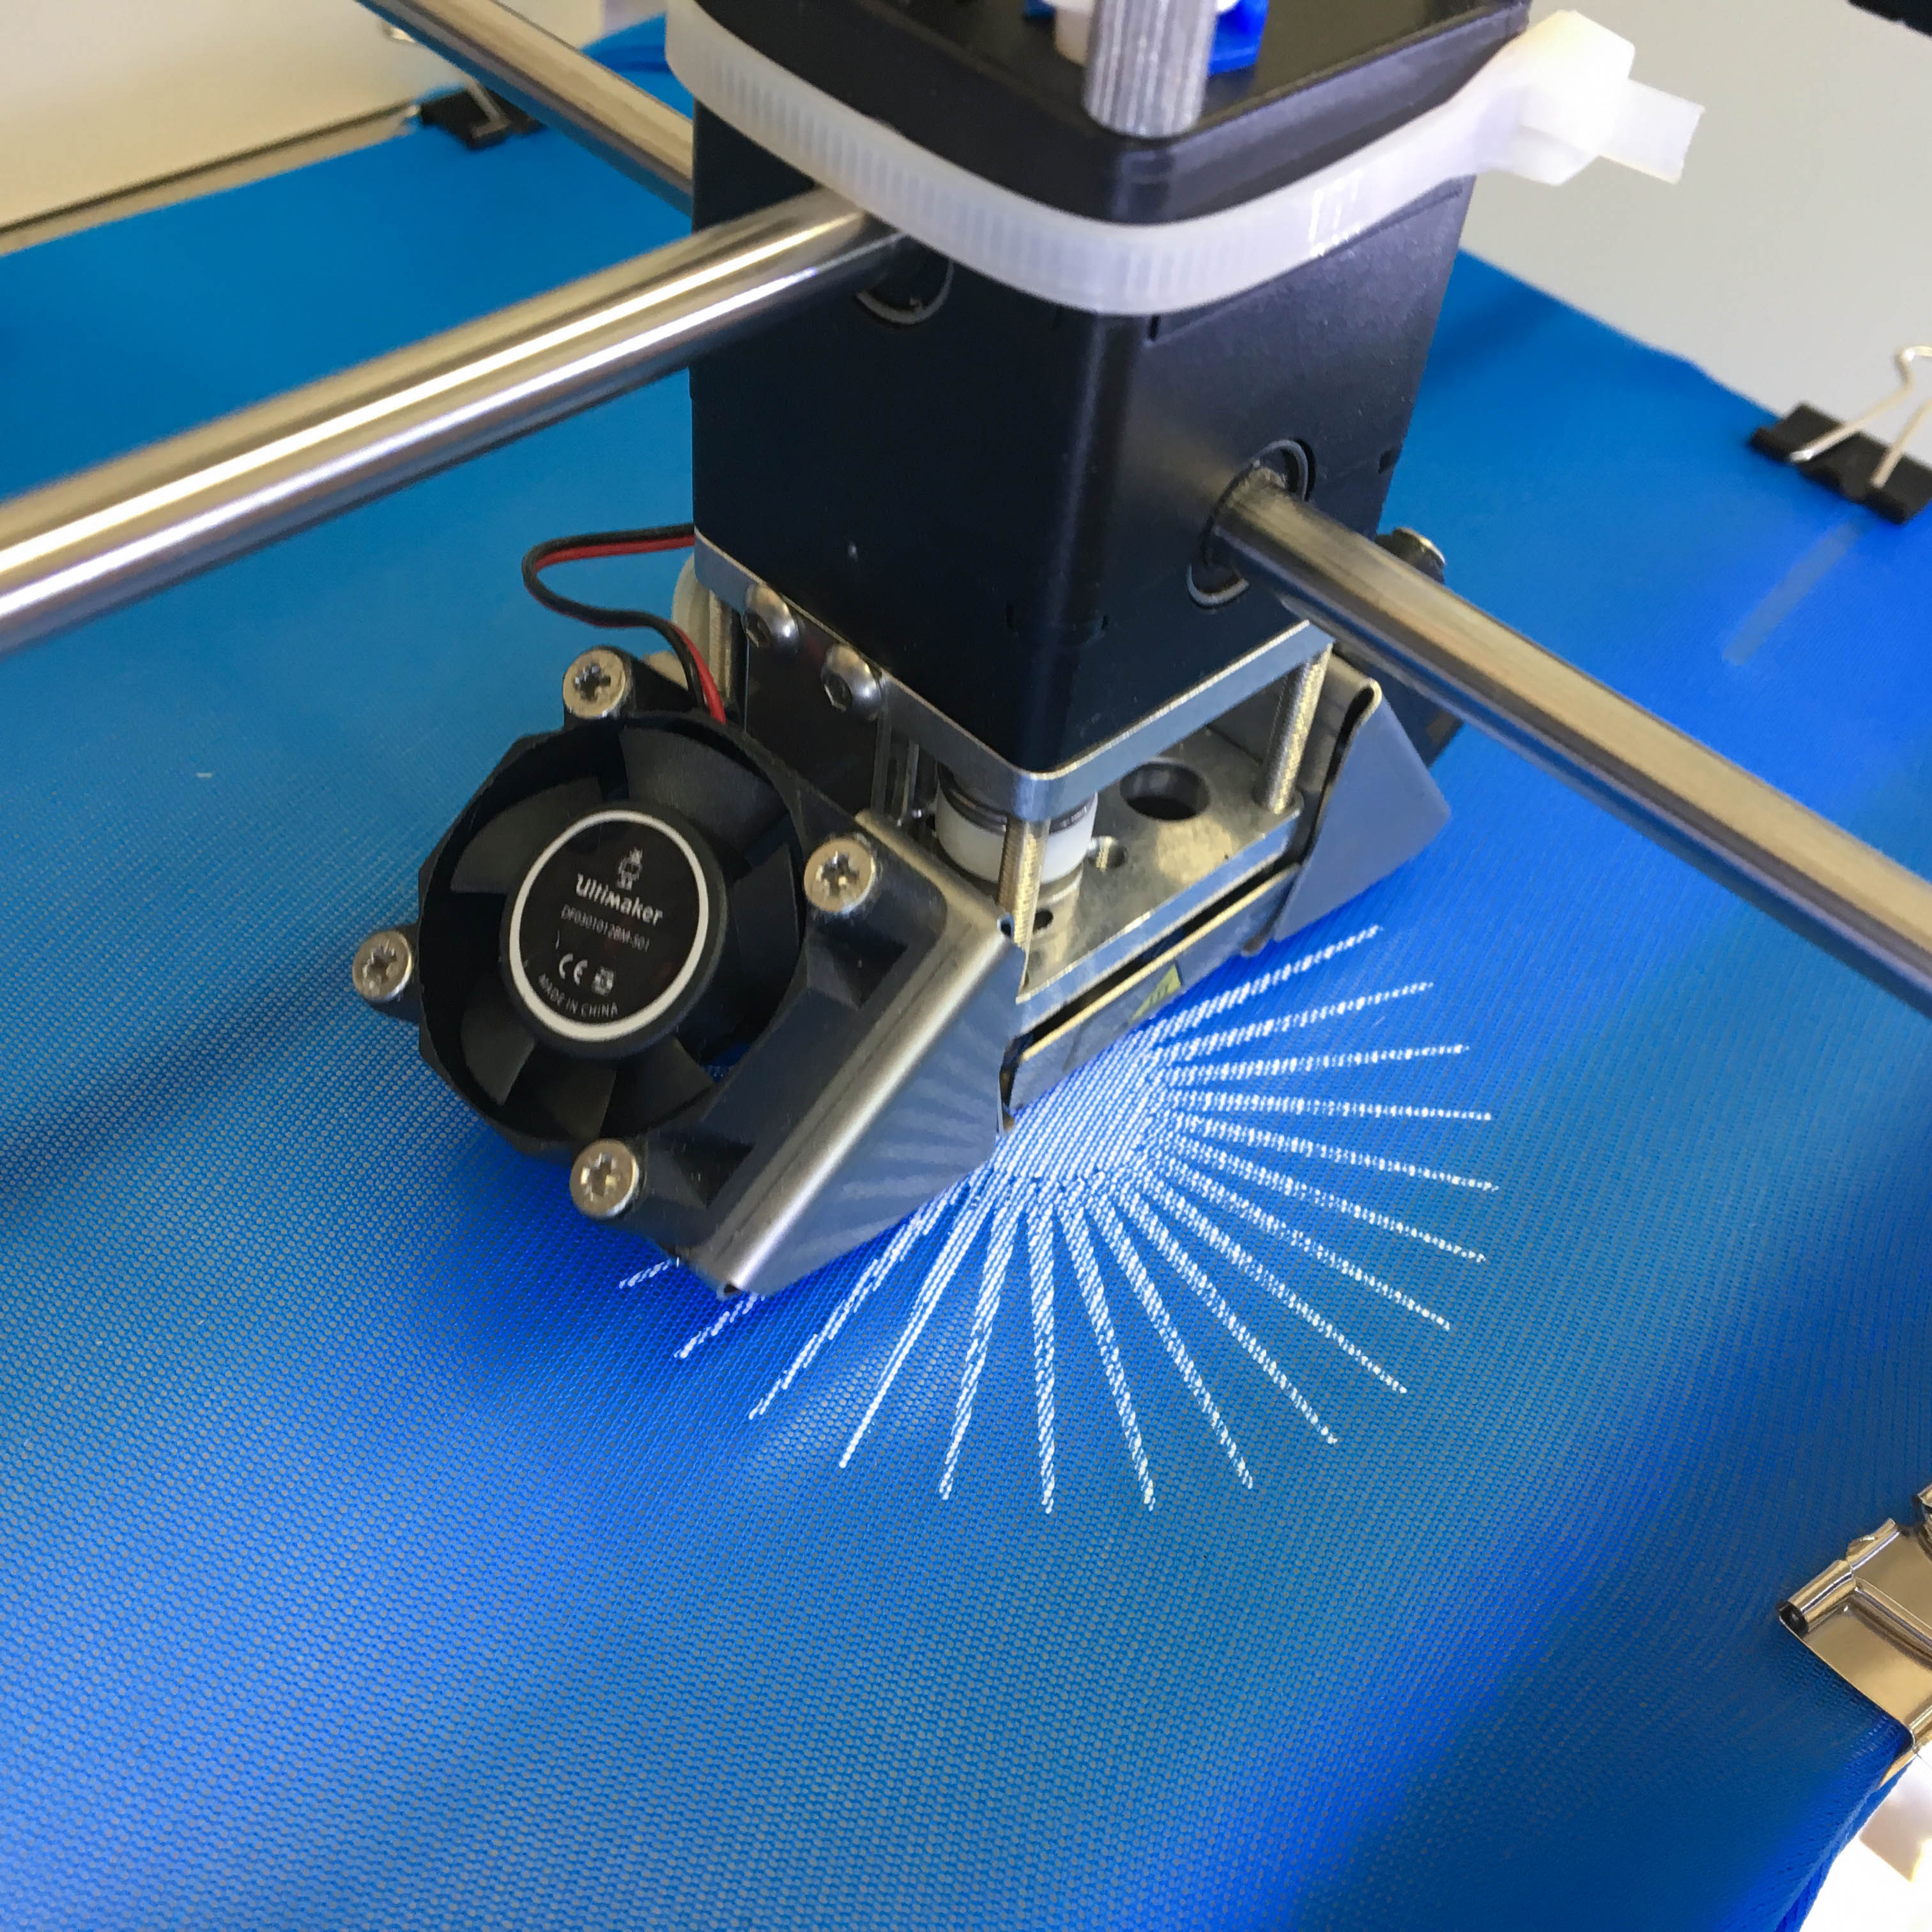
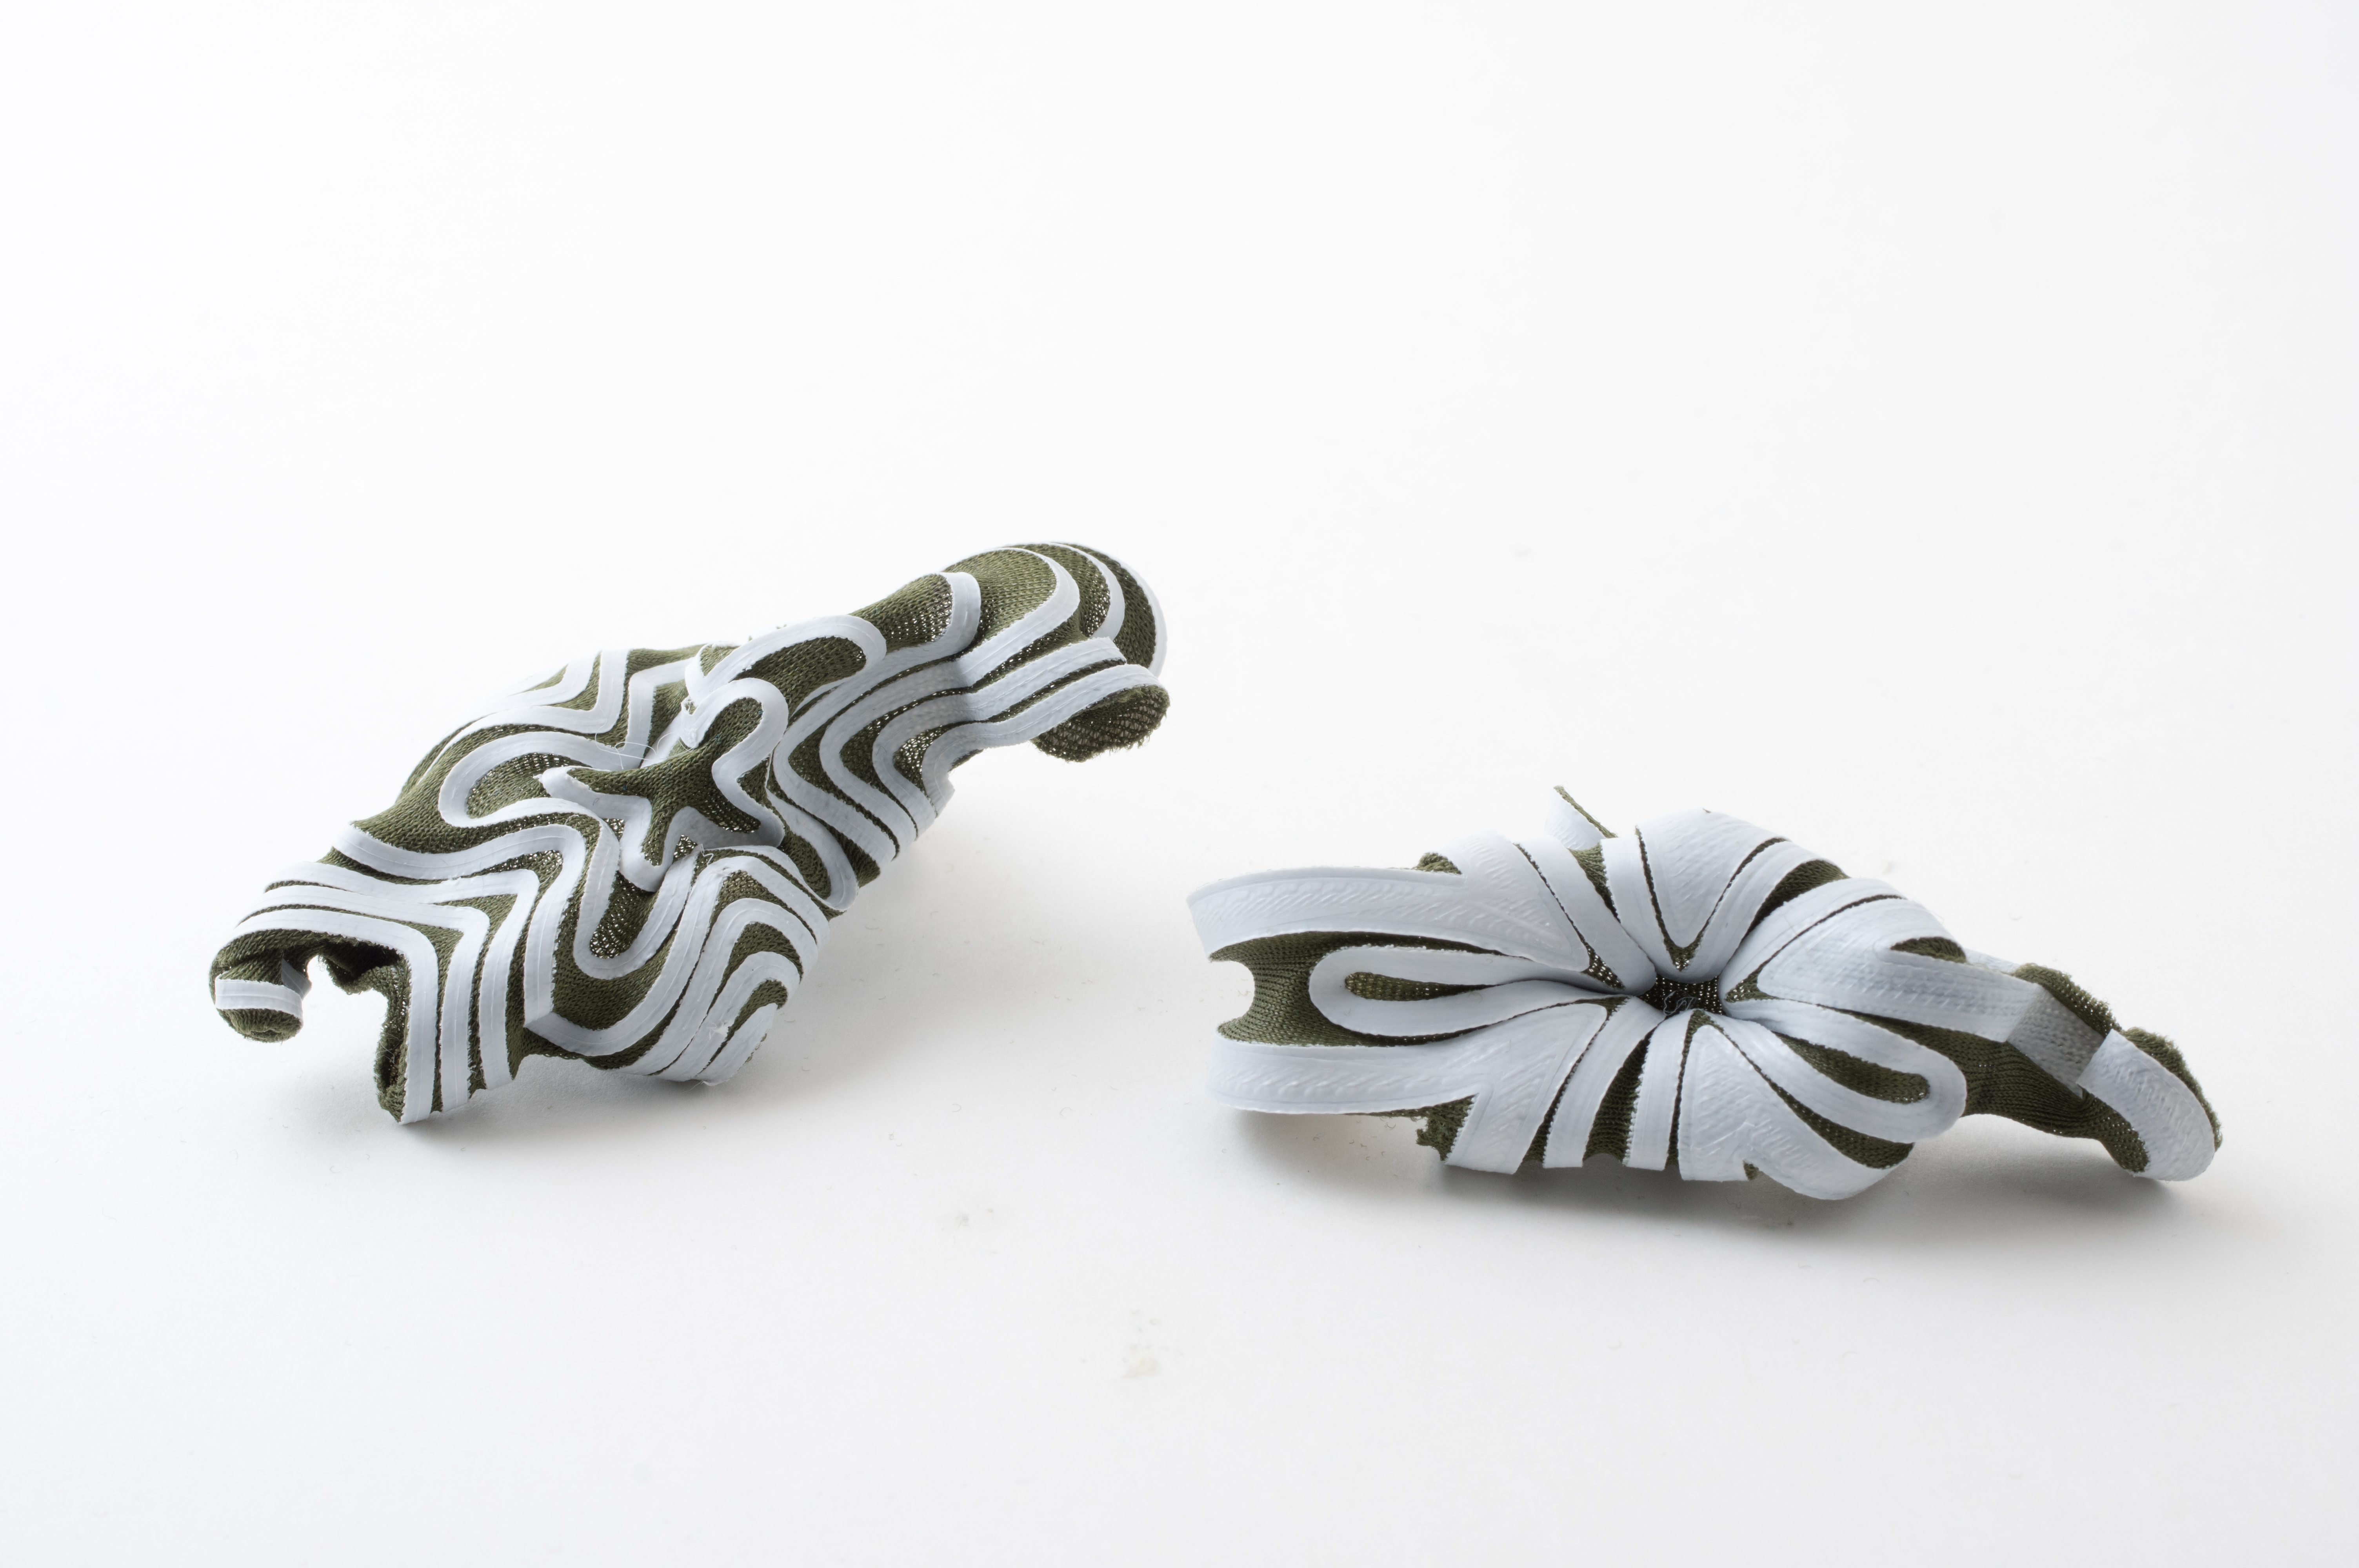
So how did we make what you saw at the top? We start by stretching a piece of fabric over the build plate of our 3D printer, and then print a 0.3 millimeter-thick pattern on top of the fabric. Once the fabric is released from tension, any areas covered by 3D printed material are unable to contract, but the rest of the fabric wants to shrink. The fact that some regions can shrink more than others causes the fabric to curve in three dimensions to find the most stable shape. It’s essentially a tug of war between the elasticity of the fabric and the rigidity of the printed plastic.

This process is reminiscent of the Floraform project, which uses differential growth in different regions of a surface to generate beautiful 3D geometry. Here, however, the surface is contracting rather than growing, and the forming of the shape happens in the real world, rather than a simulation.
Computational Method
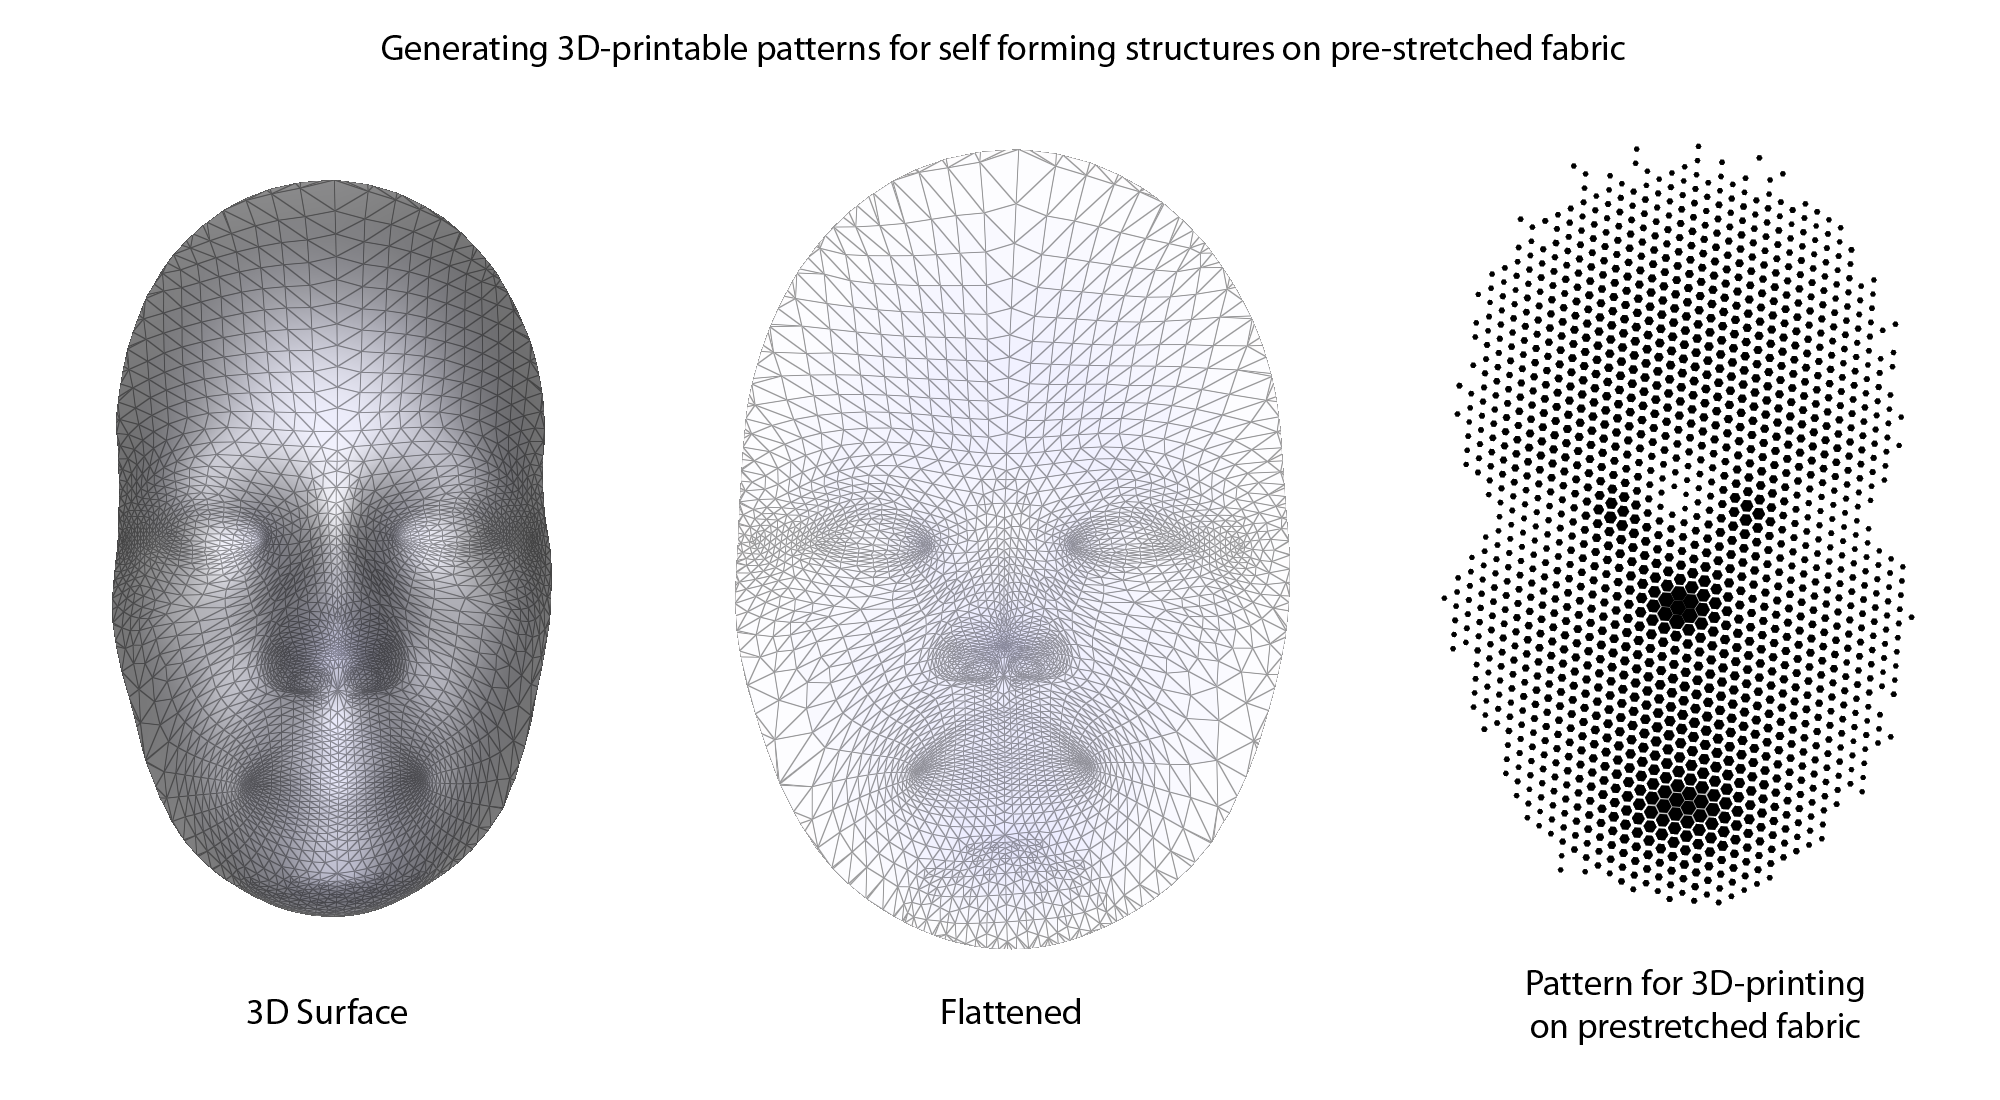
The system that we created takes in a 3D model that’s open on one side and generates a pattern to print on fabric. It starts with a normal .obj file (top left), and uses the Boundary-First Flattening algorithm (Rohan Sawhney and Keenan Crane) to get a flattened, two-dimensional version of the shape (middle image). This is done by shrinking some areas and expanding others, to effectively unstretch and unroll the model. In the image above, the regions are shaded blue to display the amount of shrinkage between the 3D shape and the flat version.
Both the flattened and 3D representations of the shape are put into an openFrameworks program, where we compute the amount of shrinkage each triangle in the model experiences. To get from a process that flattens a shape to one that induces a shape on a flat surface, the way shrinkage is represented has to change. The areas that experienced the most shrinkage in the flattening process should experience the least shrinkage when the fabric contracts after printing, and the regions that experienced little to no shrinkage in the flattening process should contract as much as possible in the fabric representation. This might sound counter-intuitive, but let’s look at it practically with the example of the nose or mouth, which sticks out a lot in the 3D model and has to shrink drastically to become flat. After stretching the fabric out in every direction, most of the area of the nose is going to be covered in 3D printed material, and the area around it has a lower amount of coverage. The printed material resists contraction, so when we release the fabric after printing, the nose wants to stay the same size more than the material around it, and that material squeezes in, causing the nose to pop out.
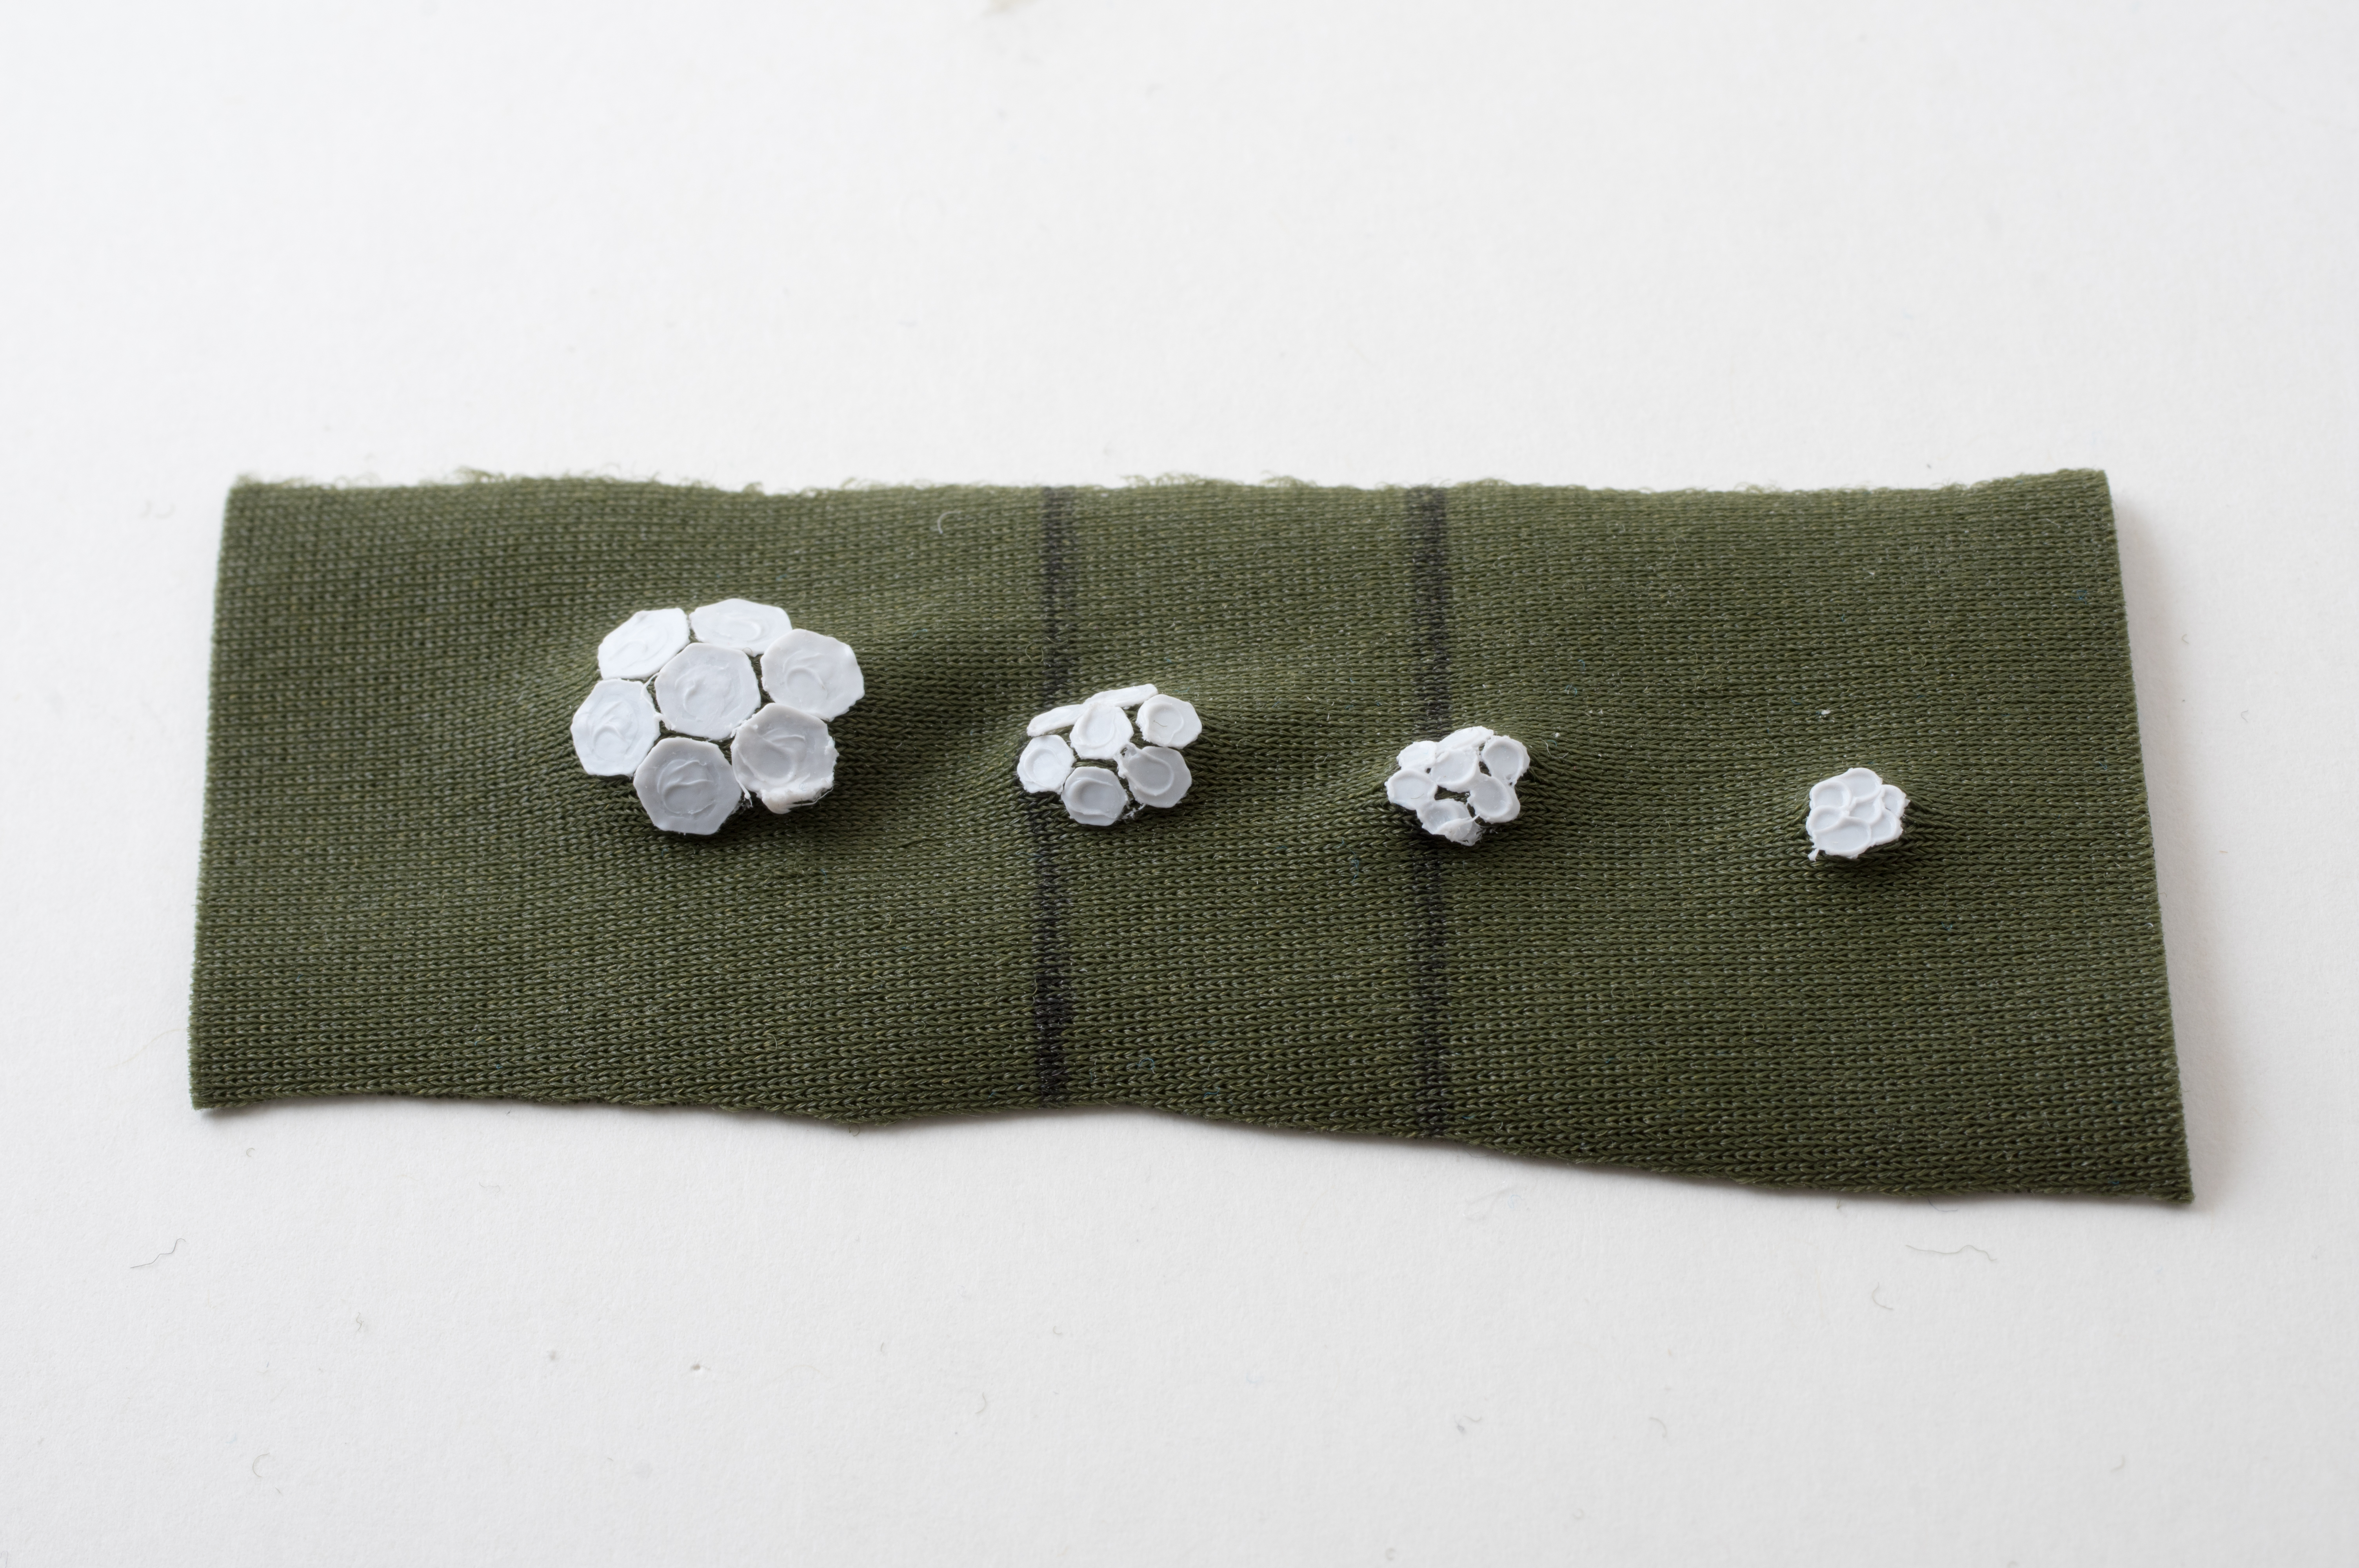
To make this happen everywhere it needs to, the program generates a non-uniform hexagonal grid. Hexagons are nice because they are one of only a few polygons that can tile a 2D space, and when you squint at them they look kind of like circles. To induce the right amount of fabric shrinkage, we take each hexagon and reduce its size programmatically. If the fabric needs to go entirely back to its unstretched scale, the hexagon should have zero size, and if the fabric shouldn’t shrink at all, the hexagon will be completely filled in.
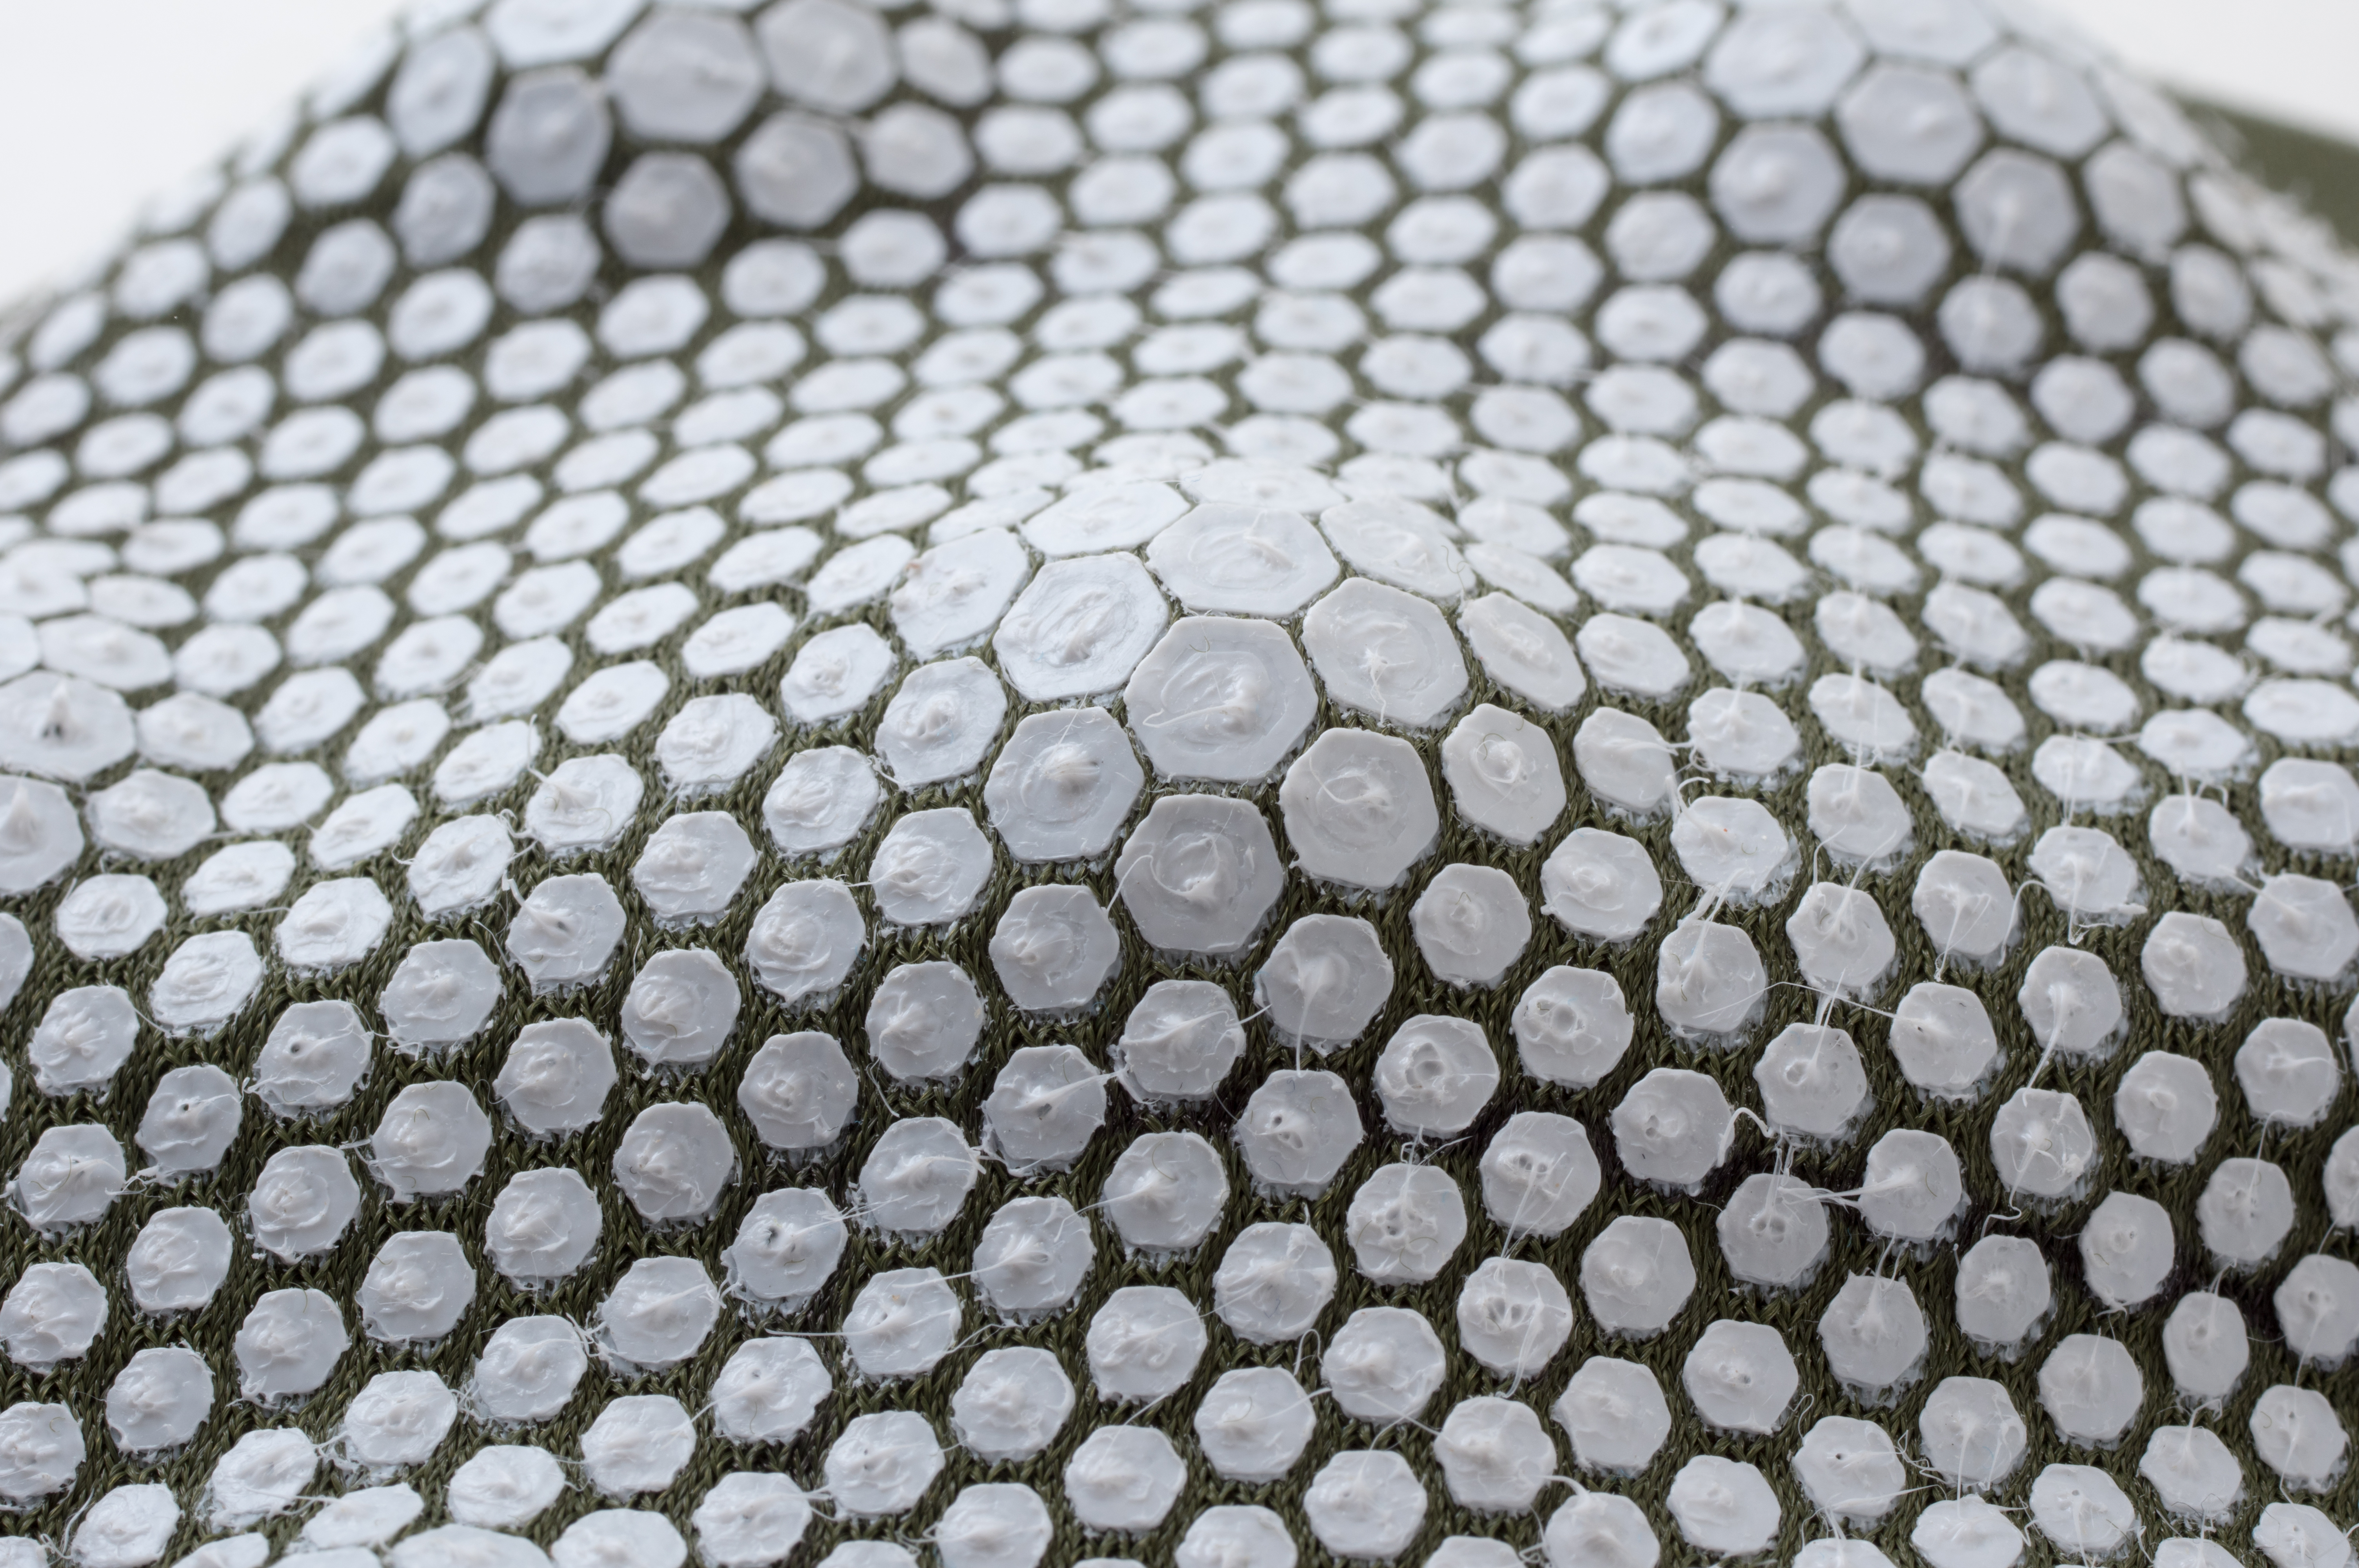
This method was surprisingly effective for creating self-forming shapes! Based on our fabrication method, though, there were some limitations on the shapes we were able to create. Theoretically, the more and smaller hexagons we use in our grid, the more detailed the shapes will be, but we weren’t able to print hexagons smaller than 2 millimeters (diameter from corner to corner) due to the 3D printer we used, which can only deposit a certain minimum amount of material. We were also constrained by the fabric, which can only stretch about 1.7 times in each direction. This means that the shapes are limited in the amount areas can stretch relative to one another.
This technique can only reproduce the Gaussian, or intrinsic, curvature of a shape. This is as opposed to mean curvature. Properties of a surface can be described as intrinsic or extrinsic. This can be a difficult distinction to understand. Extrinsic means that it requires the surface to be embedded in a 3D space to measure. As everything in the real world is embedded in 3D space this might seem a strange condition. Intrinsic properties are in a way more fundamental to a surface. If you imagine that you lived the surface with no knowledge of the space around it, these are things you could sense even as a 2D surface creature. Extrinsic curvature is bending while Gaussian curvature is distortion. For instance, if you take a piece of paper and roll it into a cylinder, you have only created extrinsic curvature. A cylinder has no intrinsic curvature, therefore you would not be able to recreate it with our method.

Other Explorations
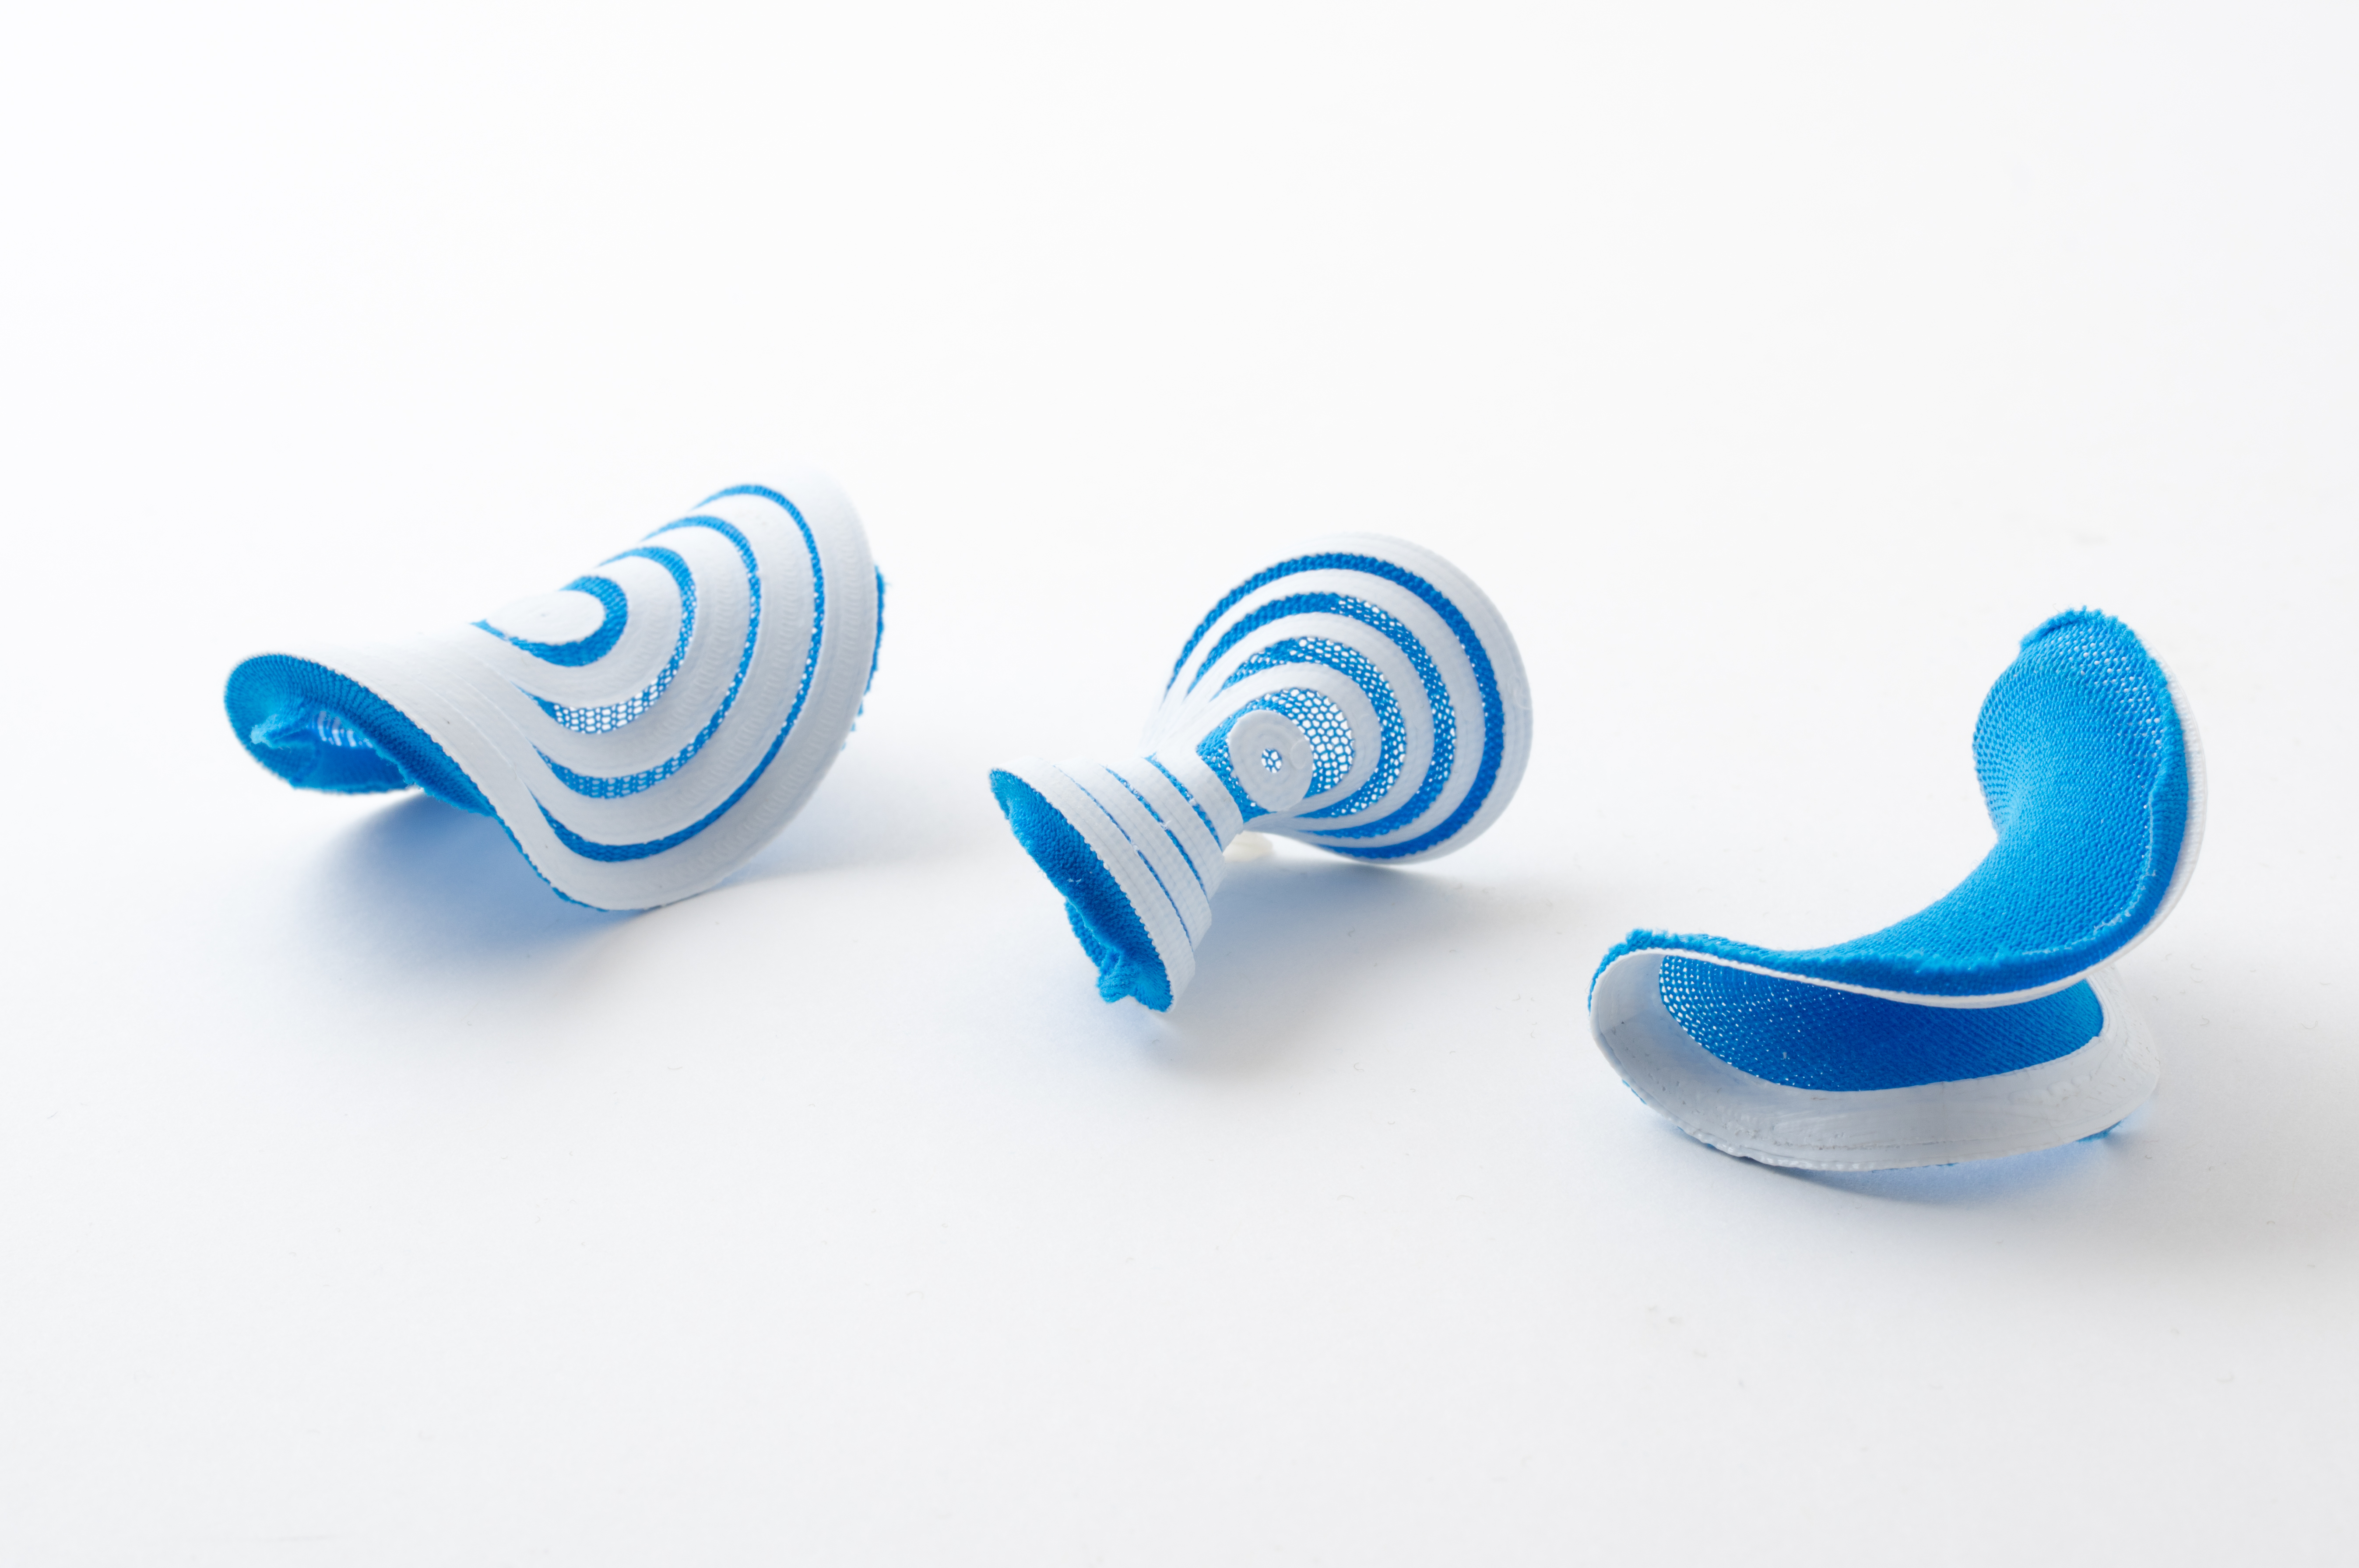
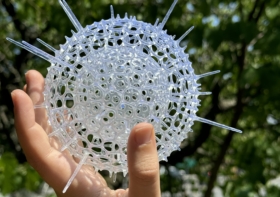
I’ll briefly go through some of the interesting-looking shapes we’ve come across over the course of this project. In our first prototypes, we tried to create the fundamental units of area distortion. If you print a circle, the outermost boundary is fixed but the inside wants to shrink, forming into a saddle shape, which is the base unit of negative gaussian curvature. This is because negative curvature can be thought of as patches of surface where area expands toward the exterior. By printing more amounts of material in concentric circles, we were able to control the amount of bending the shape took on.
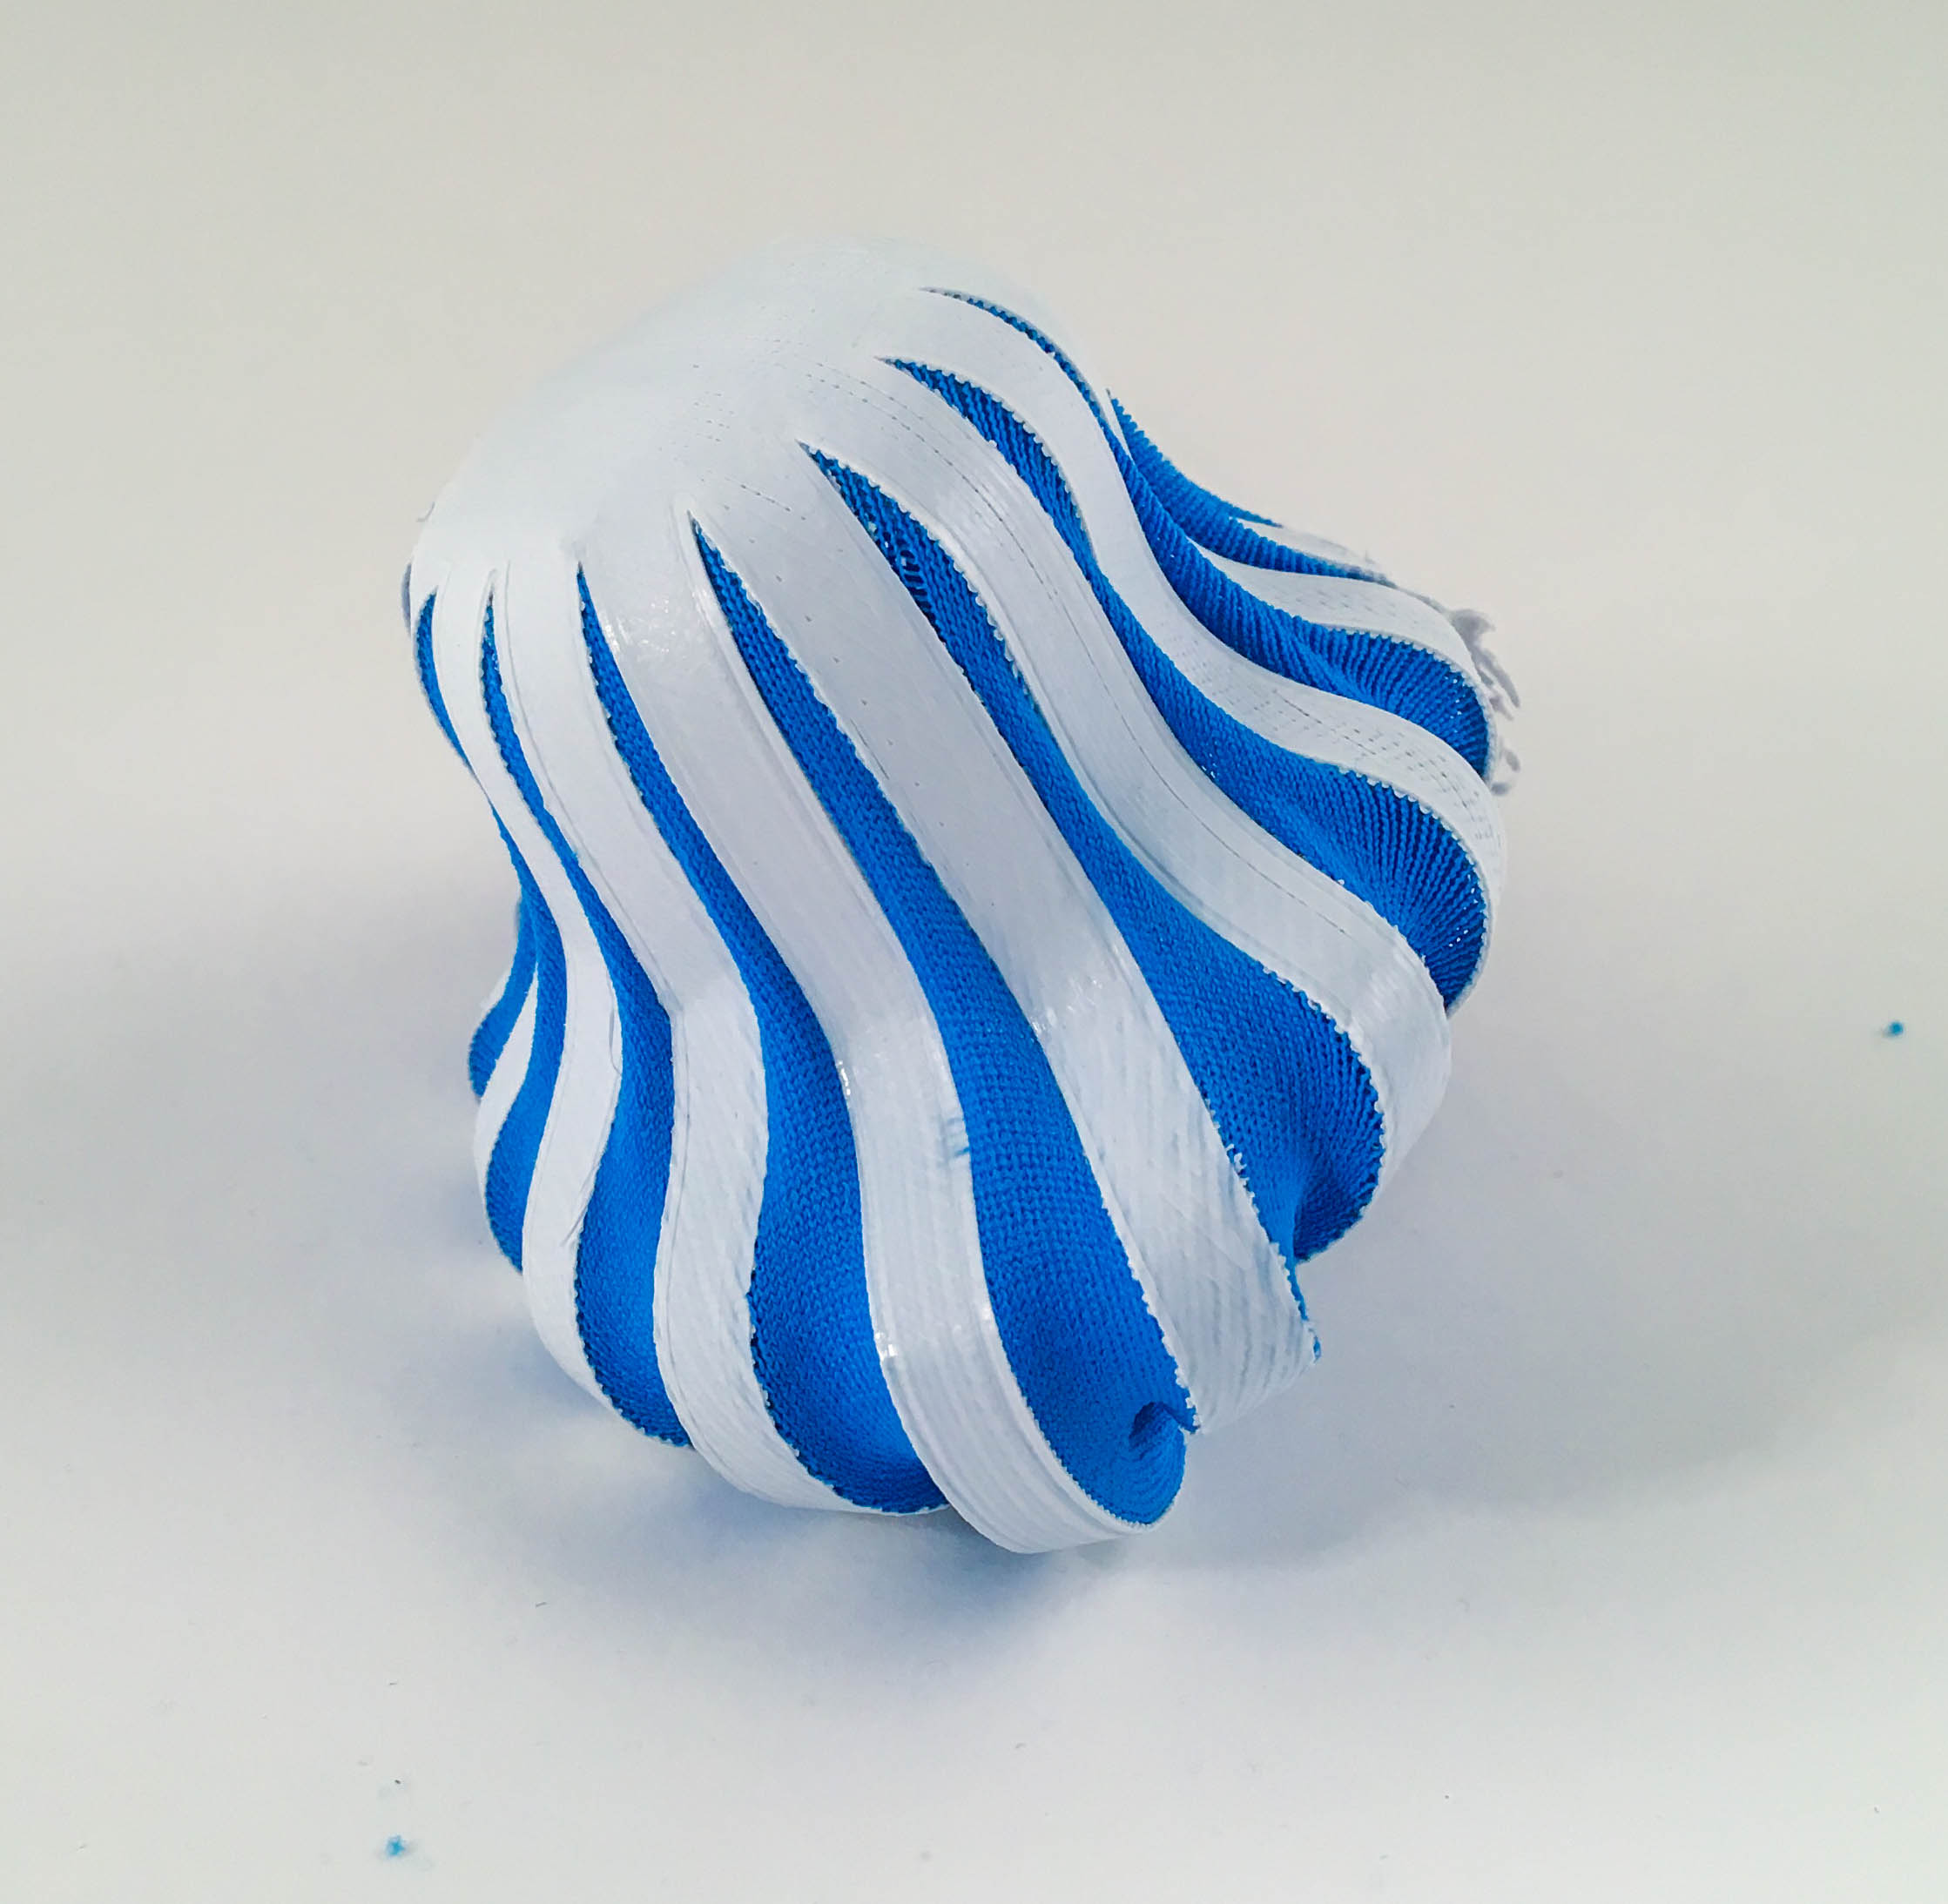
Positive curvature is trickier. We tried shapes resembling crosses and asterisks, based off of ideas from my friend Jesse Selover. The shapes we got out of these looked at first like rounded cylinders. Some took on a shape reminiscent of jellyfish, with long tendrils curving in on themselves. With shorter legs and less empty fabric, we found that the fabric would contract into domed, barnacle-like shapes.
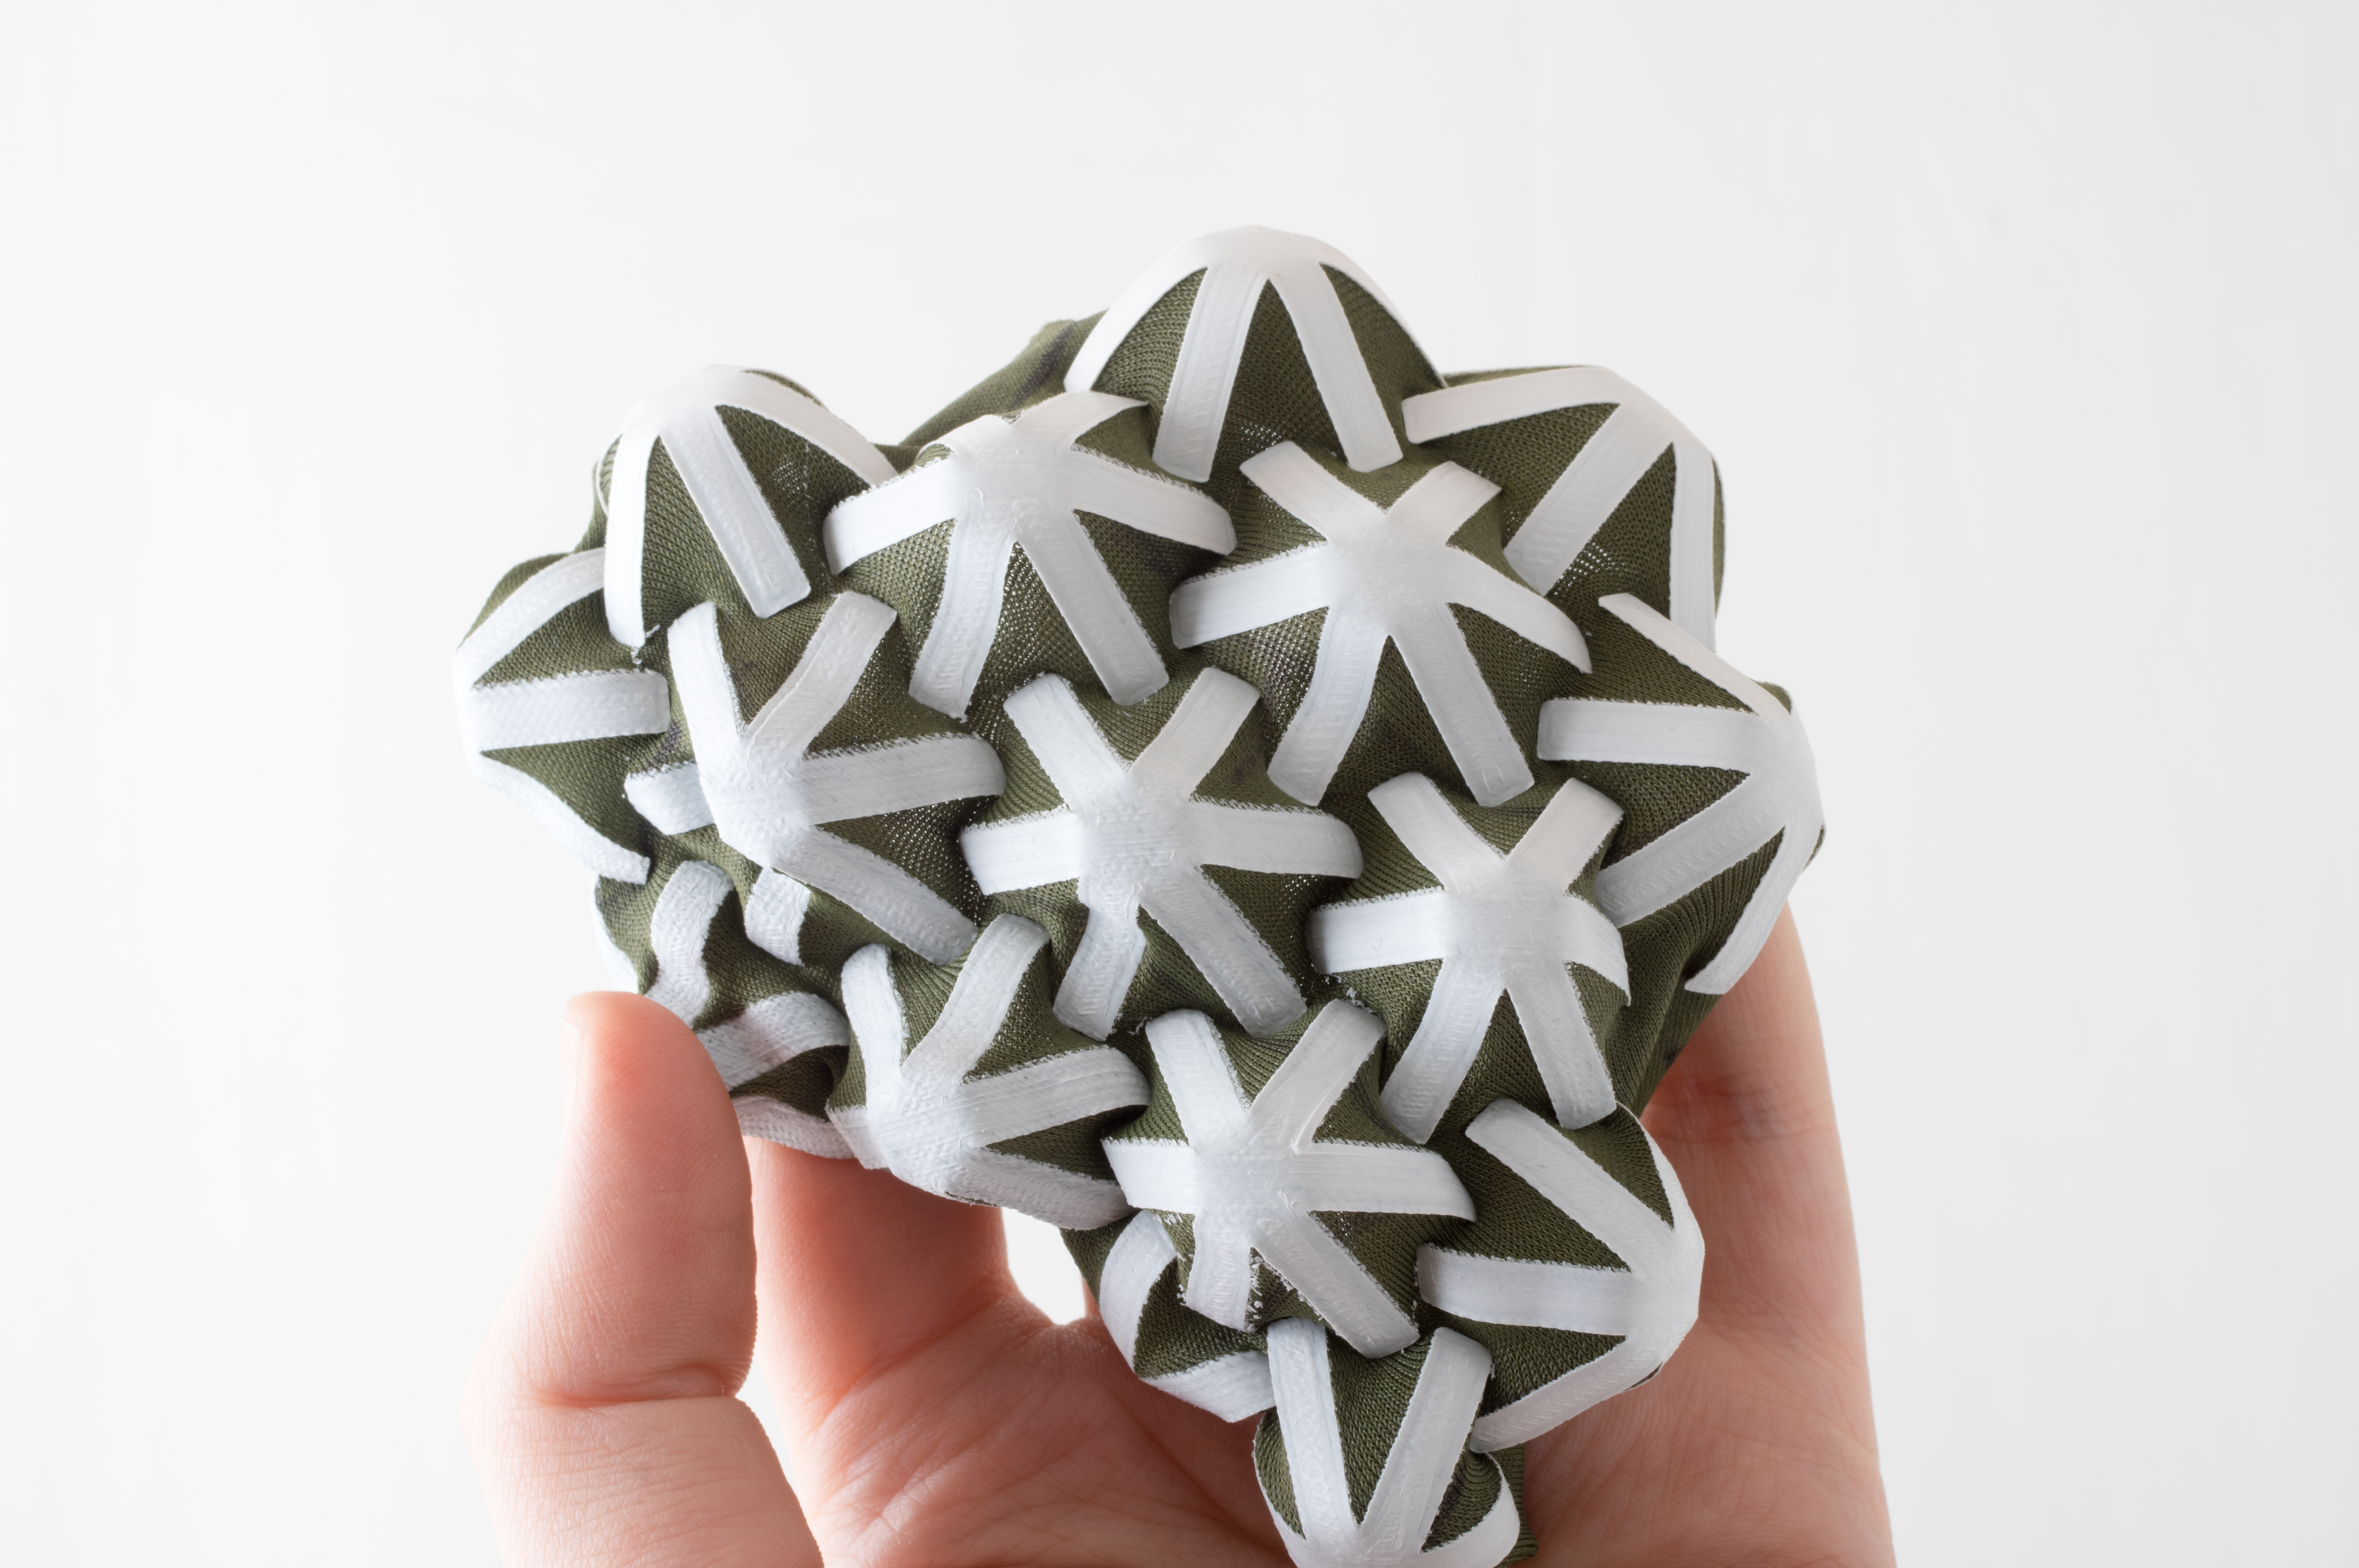
The individual shapes weren’t flowing into each other in the manner we were looking for, so we tried connecting the legs of the asterisks to each other. This induced regions of alternately positive and negative gaussian curvature, which created an egg carton-looking shape (below).

Related Projects
We’d be remiss to not mention these other projects which explore similar techniques.
Programmable Materials and Active Shoes by MIT’s Self Assembly Lab
Computational Design and Automated Fabrication of Kichhoff Plateau Surfaces by Bernhard Thomaszewski et al.
Boundary First Flattening by Rohan Sawhney and Keenan Crane
CurveUps: Shaping Objects from Flat Plates with Tension-Actuated Curvature by Ruslan Guseinov et al.

Dan
Hello Gabe and Nervous System office, my name is Dan and I am an architecture student. I was impressed by the video you posted on Instagram then tracked it down here. Thank you for sharing your exploration on this exciting structure!
Can I translate the article into Chinese and repost it on my personal page on Wechat (a popular social media in China)? I would like to share this structure with my friends if it’s possible.Your names and website will be cited, and I won’t use it to get any paid or interest. Whether it’s okay or not, please let me know! Looking forward to your reply!
Jessica
sure. thanks for asking!
stacie
lovely exploration!
Complaint Button [Maker Update #81] • Maker Project LabMaker Project Lab
[…] SELF FORMING STRUCTURES: AN EXPLORATION INTO 3D PRINTING ON PRE-STRETCHED FABRIC by Gabe Fields https://n-e-r-v-o-u-s.com/blog/?p=8011 […]
Shab Bhat
Thanks for sharing! This is one good example of 3D printing and its capability to print complex structures! being into 3D printing service i can say 3D printed fabric will be another huge step forward in the world of additive manufacturing!
LIA
this is brilliant! thanks for sharing! :)
Kelley Adams
I am glad I found this blog. Choosing a fabric building is a smart and practical choice. Thank you for sharing this helpful information.
Self-forming structures made with 3D printing at Nervous System - 3D Printing Industry
[…] on the Nervous System blog Gabe explains the […]