Posted: March 16th, 2013 | Author: Jessica Rosenkrantz | Filed under: furniture, jewelry, news, work in progress | No Comments »

We’re following through with our promise to add tables to the Radiolaria app. Soon you will be able to design your own cellular tables on our website which we CNC route in the studio from plywood. We’ve been testing out various designs and settings. We should have a finished prototype to show you next week. The tables will come complete with organic wood bases and glass inserts for the larger holes.
We now have custom jewelry boxes that fit our larger pieces. These boxes feature a branching pattern we generated with the system show in this video. They are printed in black on recycled speckletone paper, wrapped around recycled chipboard boxes.

We’ve been developing our colors for our spring/summer jewelry collection by creating our own acid dye mixes. Our retail manager, Lia, created an impressive palette of neon colors that should be available before the end of March.
We’ve been playing with two color 3d-printing using our Makerbot Replicator 1. Jesse created an app that takes any 3d model and converts it into a 3d-printable 2-color shell using reaction-diffusion. So far, we’ve just applied it to cats. But, we have some other things in mind and hope to release it as an app on our website soon…so anyone can convert any model into a 2-color print. You can download the 2-color cat models from our Thingiverse.

We made a version of the Large Hyphae Ring in sterling silver for a magazine cover photoshoot that came out spectacular!

When we release the new colors, we’ll be retiring a few pieces from the Hyphae collection and replacing them with some new designs.

Posted: October 18th, 2012 | Author: Jessica Rosenkrantz | Filed under: furniture, jewelry | No Comments »
Lately, we share a lot of snapshots of what we are working on in the studio on Instagram (username: nervous_jessica). But maybe you blog followers and website visitors might also appreciate them. Lately we’re working on….
TABLES! We’ve been cutting this reaction-diffusion piece on our router the past few nights into the wee hours. This is part of an 8′ maple table we’re fabricating for a commission.

To prepare for making the big table we tested on our settings by making a small coffee table in the same wood. Also we made legs for the first time.

PUZZLES! We’ve been making tons of puzzles for stores for the holiday season. That means I’ve got jigsaw puzzles on my brain and in my instagram.


APP MAKING – We’re almost done making the HTML5 version of the Radiolaria app. And we’re testing out stuff you will be able to make with it: earrings! necklaces! trivets!

ANIMATION – We’re working on an animation to document the ideas behind our new Orb and Orbicular lamps.

JEWELRY – And as usual we’re making tons of jewelry, 3d-printed and otherwise.

SUMMARY – We’ve been busy.
Posted: February 9th, 2011 | Author: Jessica Rosenkrantz | Filed under: design, events, furniture, housewares, jewelry | 9 Comments »

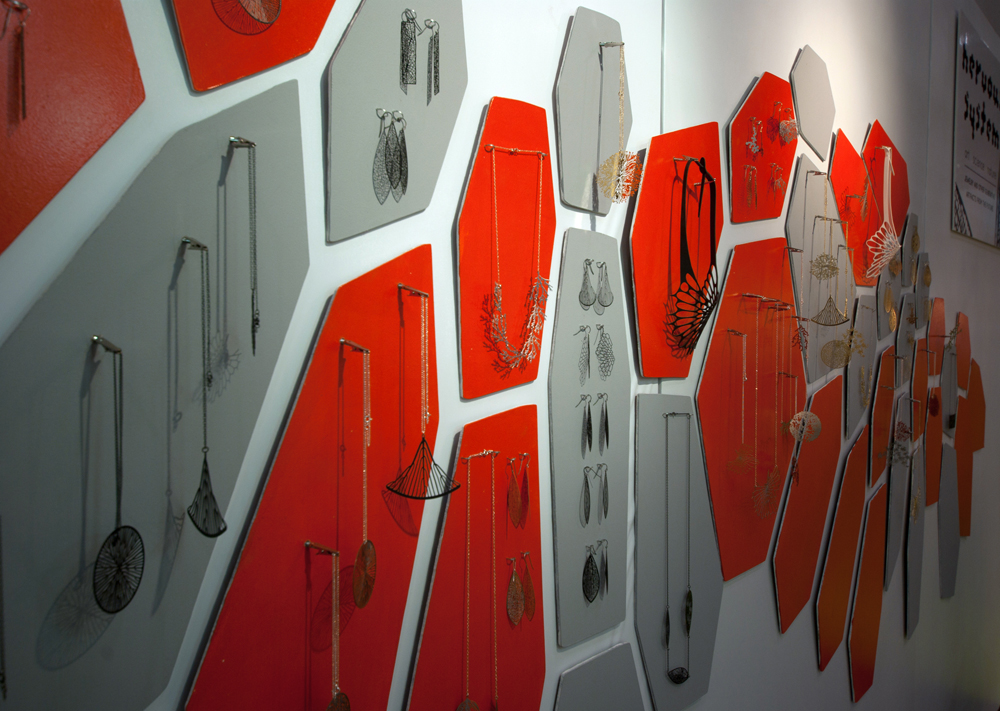
We’re back from NYC where we exhibited our products at the New York International Gift Fair for the second time! We had booth #4000 which is a small spot (15′x4′) at the front of the ‘Accent on Design‘ section. We wanted to create a booth that would allow us to show all of our products, from flat jewelry to lamps and our new porcelain cups and plates without feeling crowded.

design constraints
- inexpensive
- only take a few hours to setup (Javits center was open from 8am to 5pm)
- only take a few days to fabricate
- be completely fabricate-able using tools in our garage workshop
- pack flat so it could fit in our car
- be flashy and grab the attention of show-goers
- be awesome
We fabricated the booth entirely out of hardboard, cable ties, velcro and paint and I think it came out pretty great. Of course some things didn’t work out quite right… The booth consisted of three faceted pedestals and a design of flat panels that hung on the wall. We also had a wall mounted LCD screen which played animations of our design processes and a big sign with our logo.
assembling a simple test pedestal at home

At the start of our brainstorming, we decided we should test our construction method idea for feasibility, so we built this simple pedestal. On the left, you can see we’ve matched up the edges and connected them with cable ties. On the right, we rolled the pieces up into a 3d form and started tightening with pliers. Hey! It seems to work.
designing the booth
The next step was to design pedestals that we actually like with nice faceting. We decided to design the pedestals in Rhinoceros by creating distorted ellipsoids and then discretizing them using a script we wrote. Naturally, we wanted strange shape panels, not quads or triangles so we decided to take a tangent planes approach which works as follows:
- place points on surface
- create planes tangent to original surface at those points
- intersect and trim each plane with its neighbors
It’s simple conceptually but has some tricky issues in practice…..such as where do you place your points? how do you determine your neighbors? The main limitation is that it doesn’t work on surfaces with much negative curvature.
testing our tangent planes script

We played around with the script for a while and made many designs with 50+ panels but then realized we didn’t have time to fabricate or assemble anything that complex. (Unfortunately, we didn’t realize this until we had already fabricated and test assembled a 4′x4′ wall display that is sort of like a panelized half sphere, we loving call that design scheme ‘bug eyes’)
some of our numerous sketches


fabrication and assembly
Once we had determined our final faceted forms, we laid them out in sheets such that each edge was labeled and 2-3 points for drill holes were added along each edge for cable ties. Then we cut them out on our homemade CNC router from 4′x4′ sheets of hardboard. We also used an angled bit on the router to miter the edges of the material. After mitering the pieces, we painted them with two coats of primer and two coats of color (the colors I chose had cute names like red hot, sun ray, timber wolf, and igloo). The pieces packed flat into 3 cardboard boxes.
Once we arrived at the Javits Center, we simply had to lay pieces out on the ground and start matching edges. When we found a matching edge we used the cable ties to connect them loosely. Once a pedestal was loosely together we started slowly tightening all the ties until the pedestal was tight and sturdy, the tails of the cable ties were snipped off for tidiness.
For the back wall, we used a 2D design that was created in our Radiolaria applet. We used our CNC router to cut out the pieces from hardboard, sanded and painted them. To mount the pieces on the wall, we used sticky-back velcro which was quick and allowed for easy repositioning. We mounted gator clips to hold the jewelry.

Overall, a fun couple of days.
Posted: September 10th, 2010 | Author: Jessica Rosenkrantz | Filed under: exhibition, furniture | Tags: cnc | 7 Comments »

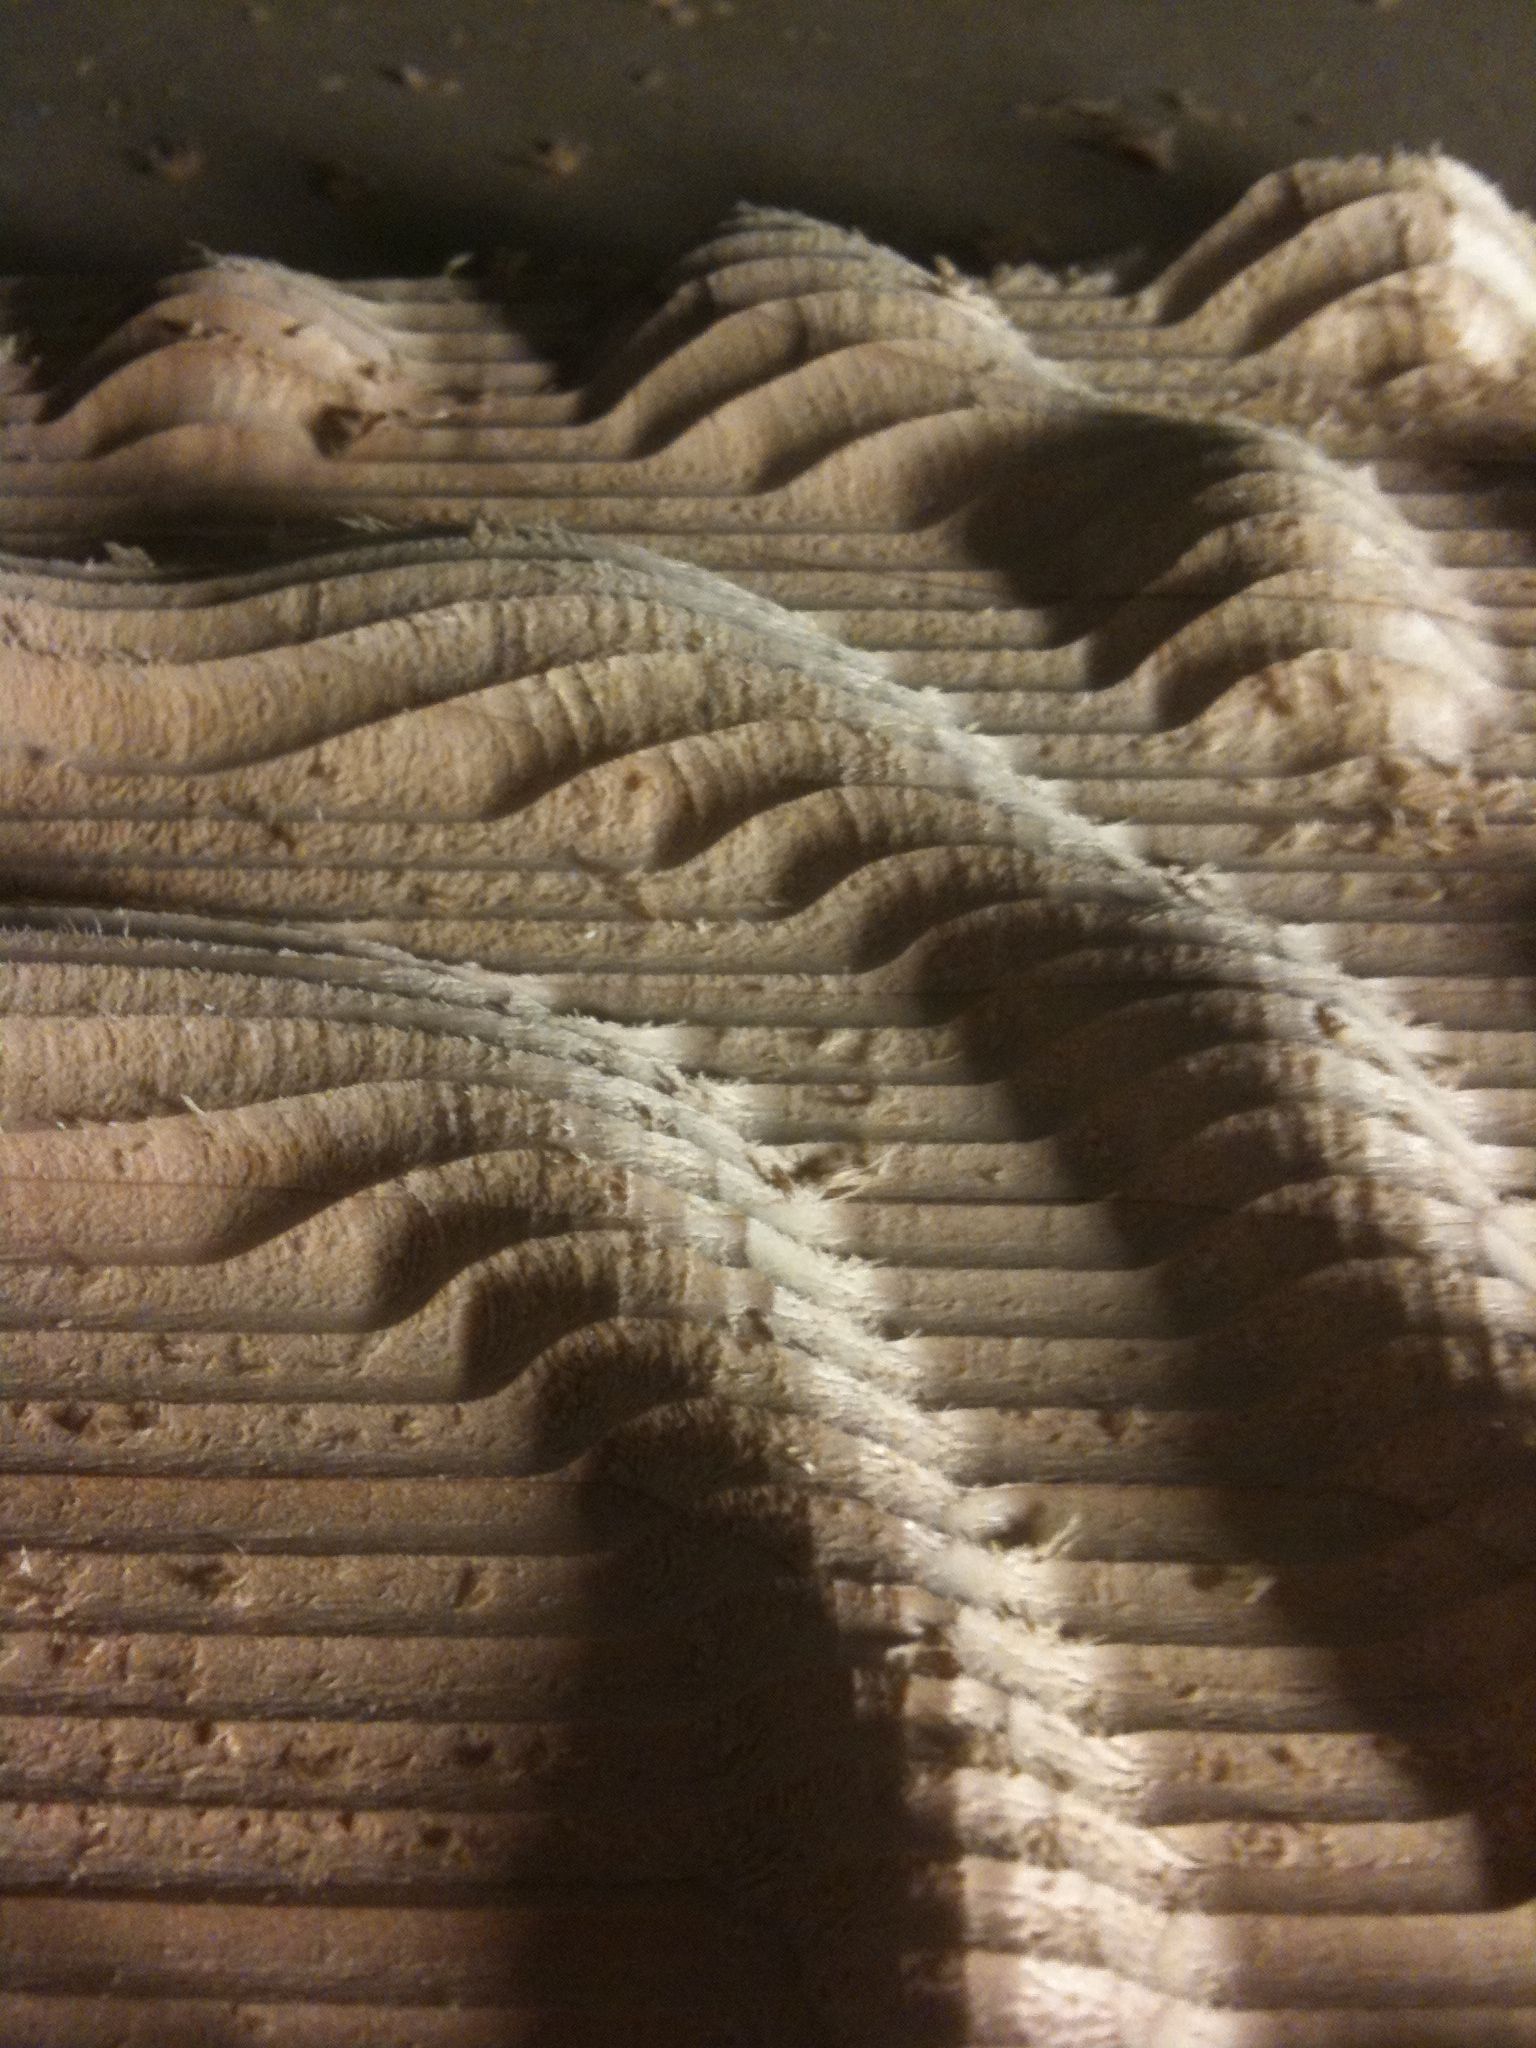
As some of our long term readers may know, we have a home-made CNC router that lives in our garage. Prior to our reaction exhibit we gave the router a bit of a tune-up and added a dust collection system with the help of our friends from Sprout. Previously, we have only used the router for 2d cutting….mostly due to inaccuracies in the z-axis and lack of time to figure out how to do more complicated code to run the machine….but this time we had a couple extra days to get things going. I designed a shelf using one of our reaction-diffusion programs that had specific spaces where the porcelain prototypes of our new dinnerware line could rest. I think it came out well! The wood is cheap pine bought at our local hardware store.

Below are some in process shots. After routing the surface out with a rough pass we did a finishing pass with a small stepover and some hand sanding as well.

Posted: May 31st, 2009 | Author: Jessica Rosenkrantz | Filed under: furniture | Tags: cnc, plywood | 6 Comments »

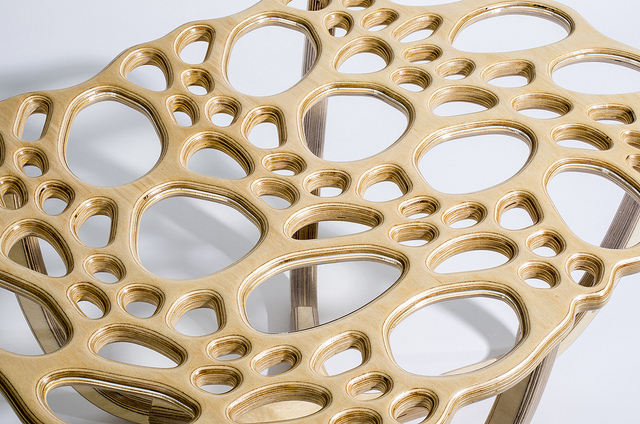
We made a new display wall to show our jewelry at ICFF this year out of bent plywood. After making some sketches in Rhino, Jesse built a more rigorous model in CATIA. The idea was to use the bend of the plywood to create both wall-like and shelf-like elements. The 3-dimensional nature of the new Cell Cycle line meant that we needed flat surfaces to display pieces on, in addition to our usual hanging space. Using CATIA allowed us very close control over how the surfaces curves were created so we could ensure the shelves were perfectly flat and sized for the pieces.
We used a CNC router to cut six 4′x4′ pieces of MDF into molds. We decided to only make every other layer needed for the full thickness of the plywood which saved quite a bit of materials and machine time, but meant we spent hours screwing spacers on to the pieces. The display is made up of 10 bent plywood strips, which means there were 10 molds, each with a male and female side. We cut down 4′x8′ sheets of 1/40″ cherry veneer into strips of an appropriate size. Then we layered six strips with epoxy resin glue using a foam roller. The stack was then carefully put in between the two halves of the mold and 2-4 clamps were used to apply pressure over a 24 hour period.

The next day, we removed the pieces from the molds, trimmed the top and bottom edge, and sanded everything. For our first attempt at bent plywood, I think it came out very well!
Posted: January 9th, 2009 | Author: Jessica Rosenkrantz | Filed under: furniture | Tags: cnc, DIY, plywood | 3 Comments »


please ignore the yarn….
side table, desk x 2, bed, dresser and bookshelves coming soon
I’m pretty satisfied with the thickness of the branches in this piece, and somewhat unsatisfied with the the frame we built on the bottom of the table top to prevent warping, next version will have a hidden frame. We limited the amount of space the branches took up to maintain adequate leg space, but I think they could have bit more expansive on the long edge of the table.
Posted: January 4th, 2009 | Author: Jessica Rosenkrantz | Filed under: furniture | Tags: cnc, DIY, plywood | 4 Comments »
Well we finished assembling one chair, it is not actually finished since it needs to be sanded and then clear coated or painted. All of the connections are done solely with wood joinery and all the cutting was done with a CNC router in our basement that we built ourselves. The pieces will be disassembled for transport to our new apartment in Boston and then finished in situ. The bottom on this chair is going to be flipped in the other chairs, so far we’ve completed 2.5 but the computer that’s running the router keeps crashing since it is running ubuntu off of a cd-rom. We’ve taken a quick break to repartition the computer so we can run linux off the harddisk for fewer mishaps.


Posted: January 4th, 2009 | Author: Jessica Rosenkrantz | Filed under: furniture | Tags: cnc, DIY, plywood | 1 Comment »
As of January 11th, Nervous System will be moving to Boston! Our new apartment is ~1200 sq ft and located in Union Square. We decided to take a week and design and build all of our furniture: dining room table and chairs, dressers, bookshelves, side tables, bed frame, etc. Everything on our router, in our basement in NY. Mostly we are using AC plywood, which is the cheapest grade of plywood, and then some finished maple plywood for tables.
Here is a dining chair in progress:


From left to right: wood left over from cutting the two side of a chair, jesse sanding the seat of a chair, the router cutting a chair back
Posted: April 1st, 2008 | Author: Jessica Rosenkrantz | Filed under: furniture, work in progress | Tags: furniture, lasercut, ponoko, table | 1 Comment »
Here are some sketches for a table we’ve been working on for the past few days.
The basic idea behind it is to create a flat-pak, lasercut table composed of a complex, 3 dimensional branching structure that supports several lily pad-like plexiglass surfaces. One of the main issues we faced at first was how to join the flat pieces 3-dimensionally. At first we considered a system of notches but results seemed too messy and not very structural. Instead, we developed a system of joints and members in Digital Project. To enable us to make smooth transitions between members at any angle we are using three layers of material per piece which will be connected with pegs. Each joint is either a Y or an L shaped piece which interlocks with the members to create a strong and smooth connection.
Here are three examples of tables you can create with our joint system.


We decided to build a somewhat smaller table though as a test of concept to check out tolerances and the structural capabilities of the system. Here is a screenshot from CATIA showing the mini table we are having made:

Our new friends Ponoko are providing the laser services for us to produce this table. We entered their jewelry competition last month and are anxiously waiting to hear the results. Jesse will also be contributing to their blog in the future.
Here is a shot of the super cute cut file export Jesse made from CATIA:
